How-to guide
How to Set Up a BOGO (Buy One Get One) Discount on Shopify
A BOGO (Buy X Get Y) promo rewards a purchase of one set of items with a discount on another, and Shopify needs specific items on both sides. This guide creates Buy 2 Tees, Get 1 Free on the Tees collection, applied automatically at checkout.
6 steps About 4 min
When to Use It
Use BOGO when you want to lift units per order rather than cut the price of a single item. It pairs well with a collection you want to move faster.
- Moving volume on a collection with healthy margin
- Pairing a bestseller with slower stock as the get item
- Bundles where the headline is a free item, not a percent
Set It Up in 6 Steps
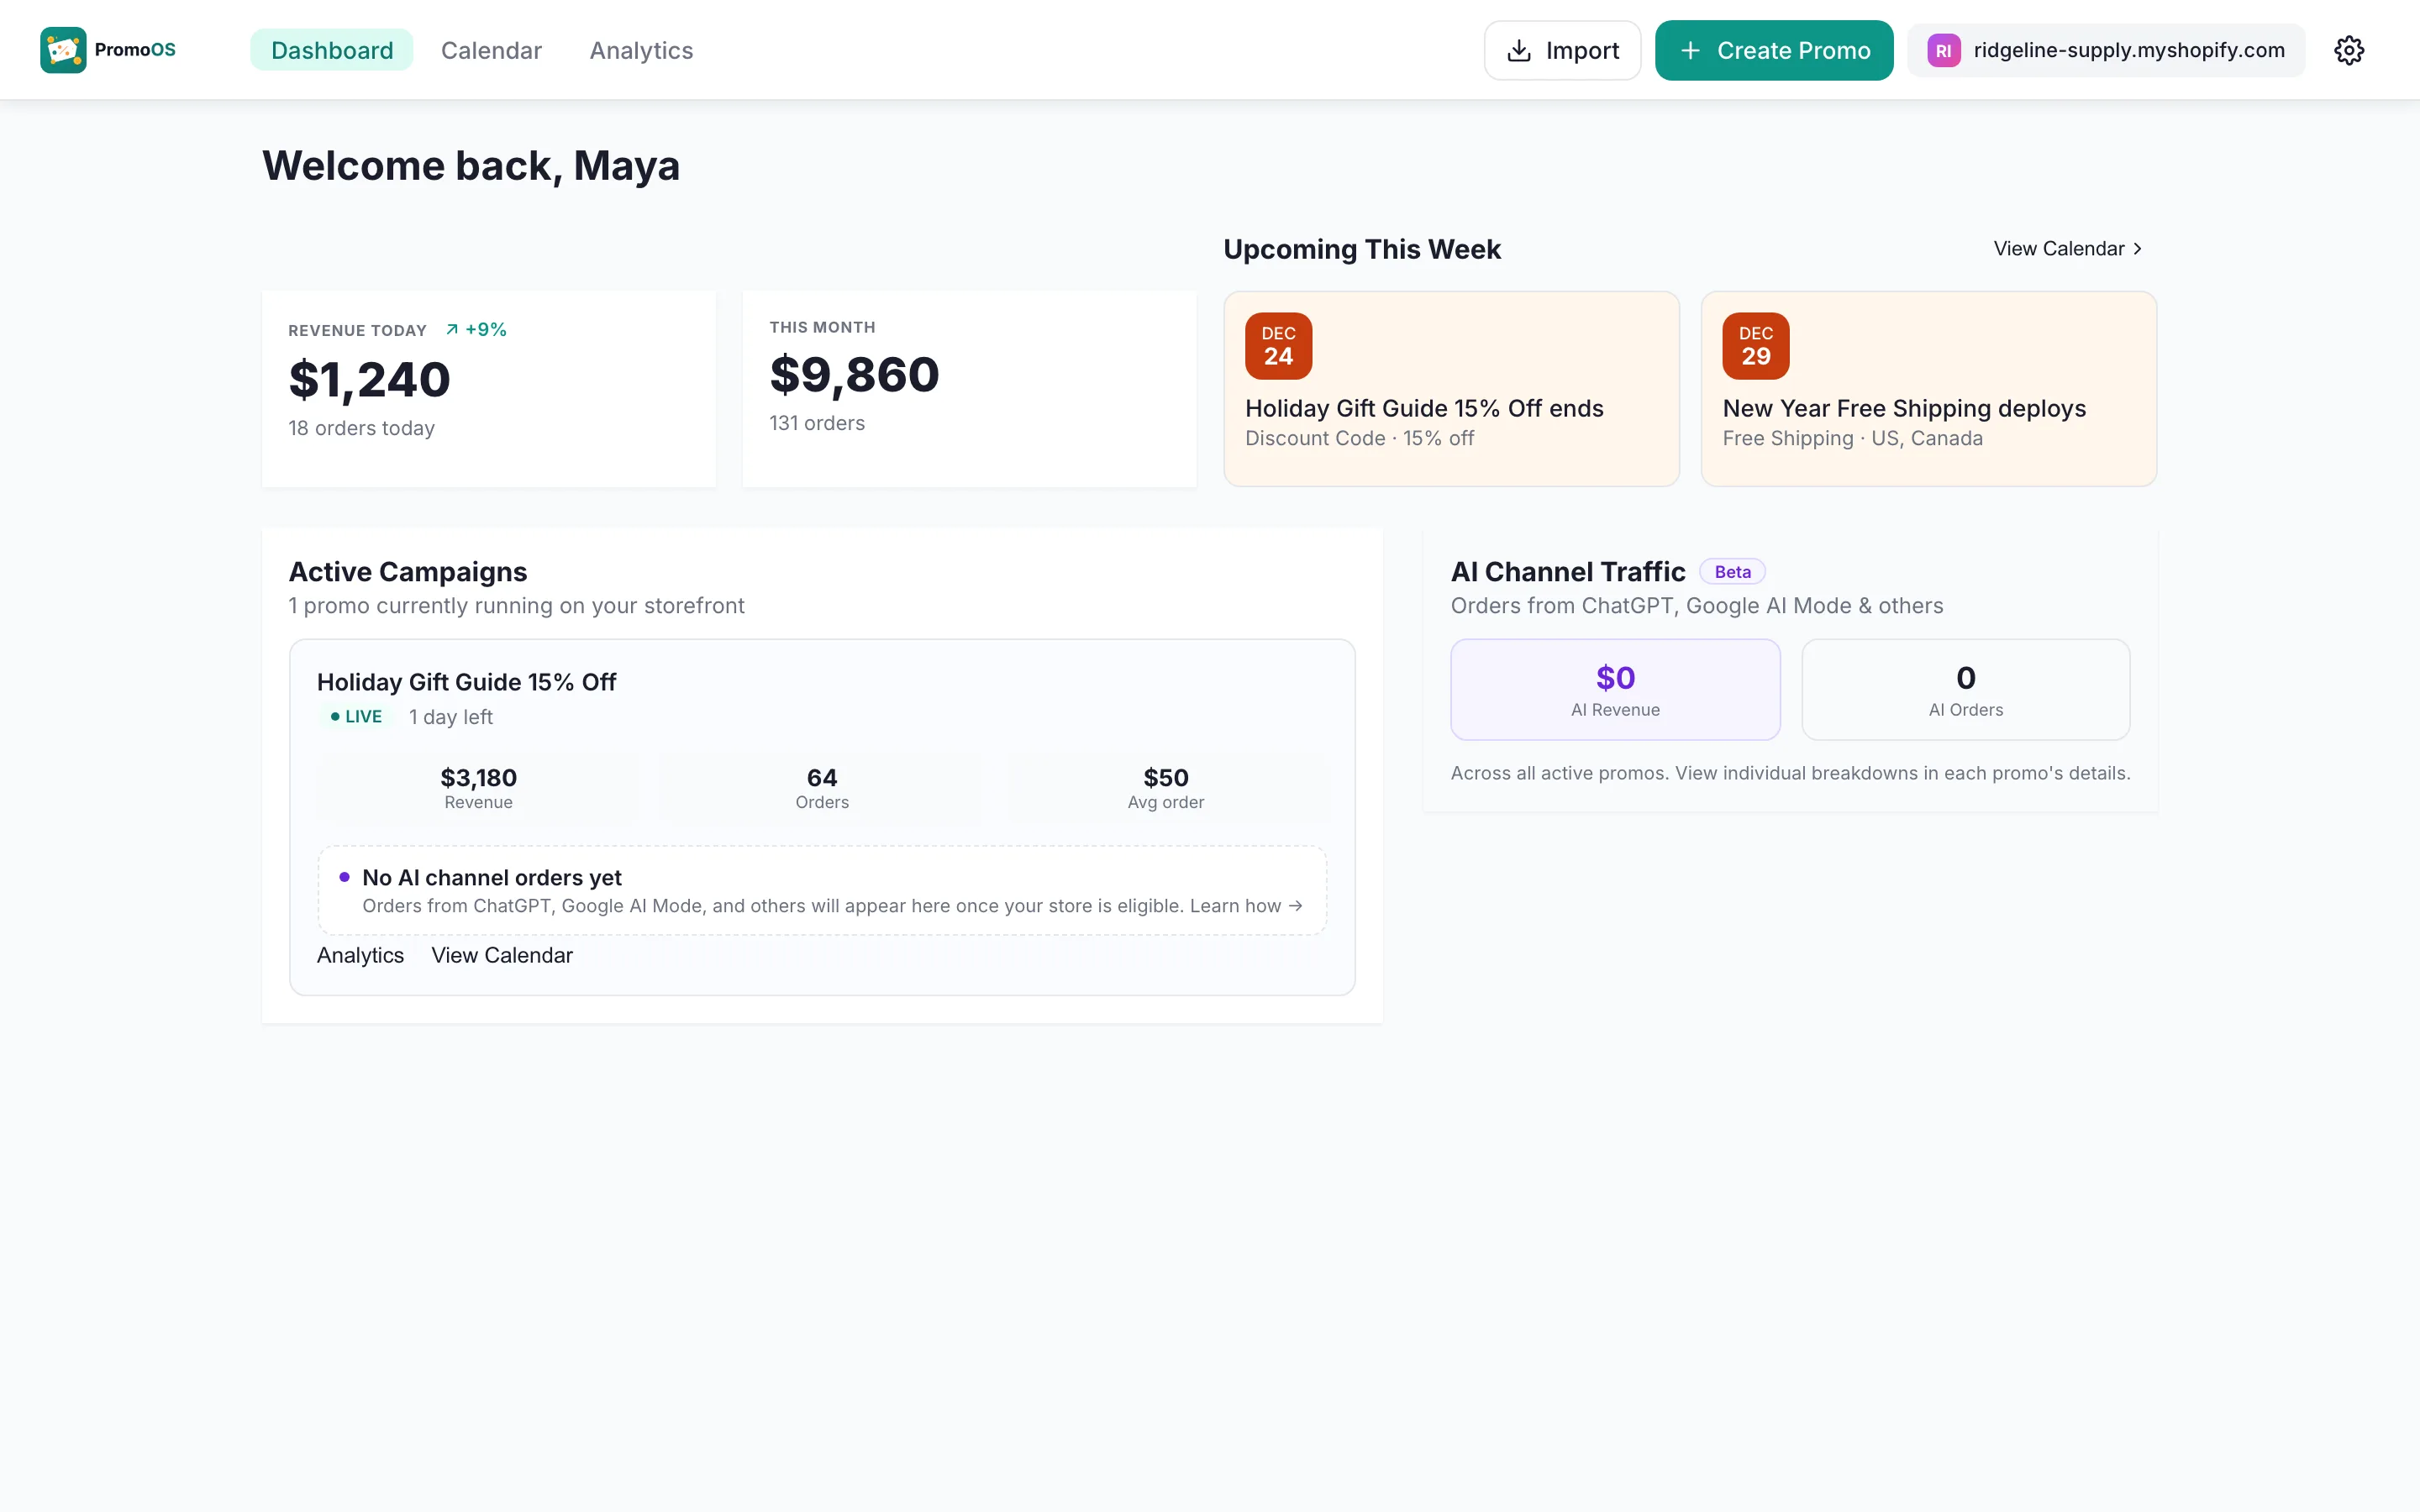
Open Create Promo from the Dashboard
Sign in to PromoOS and click Create Promo in the header. The Create Promotion dialog opens on the Promo Type step.
The Dashboard with Create Promo in the top right Choose Discount Code
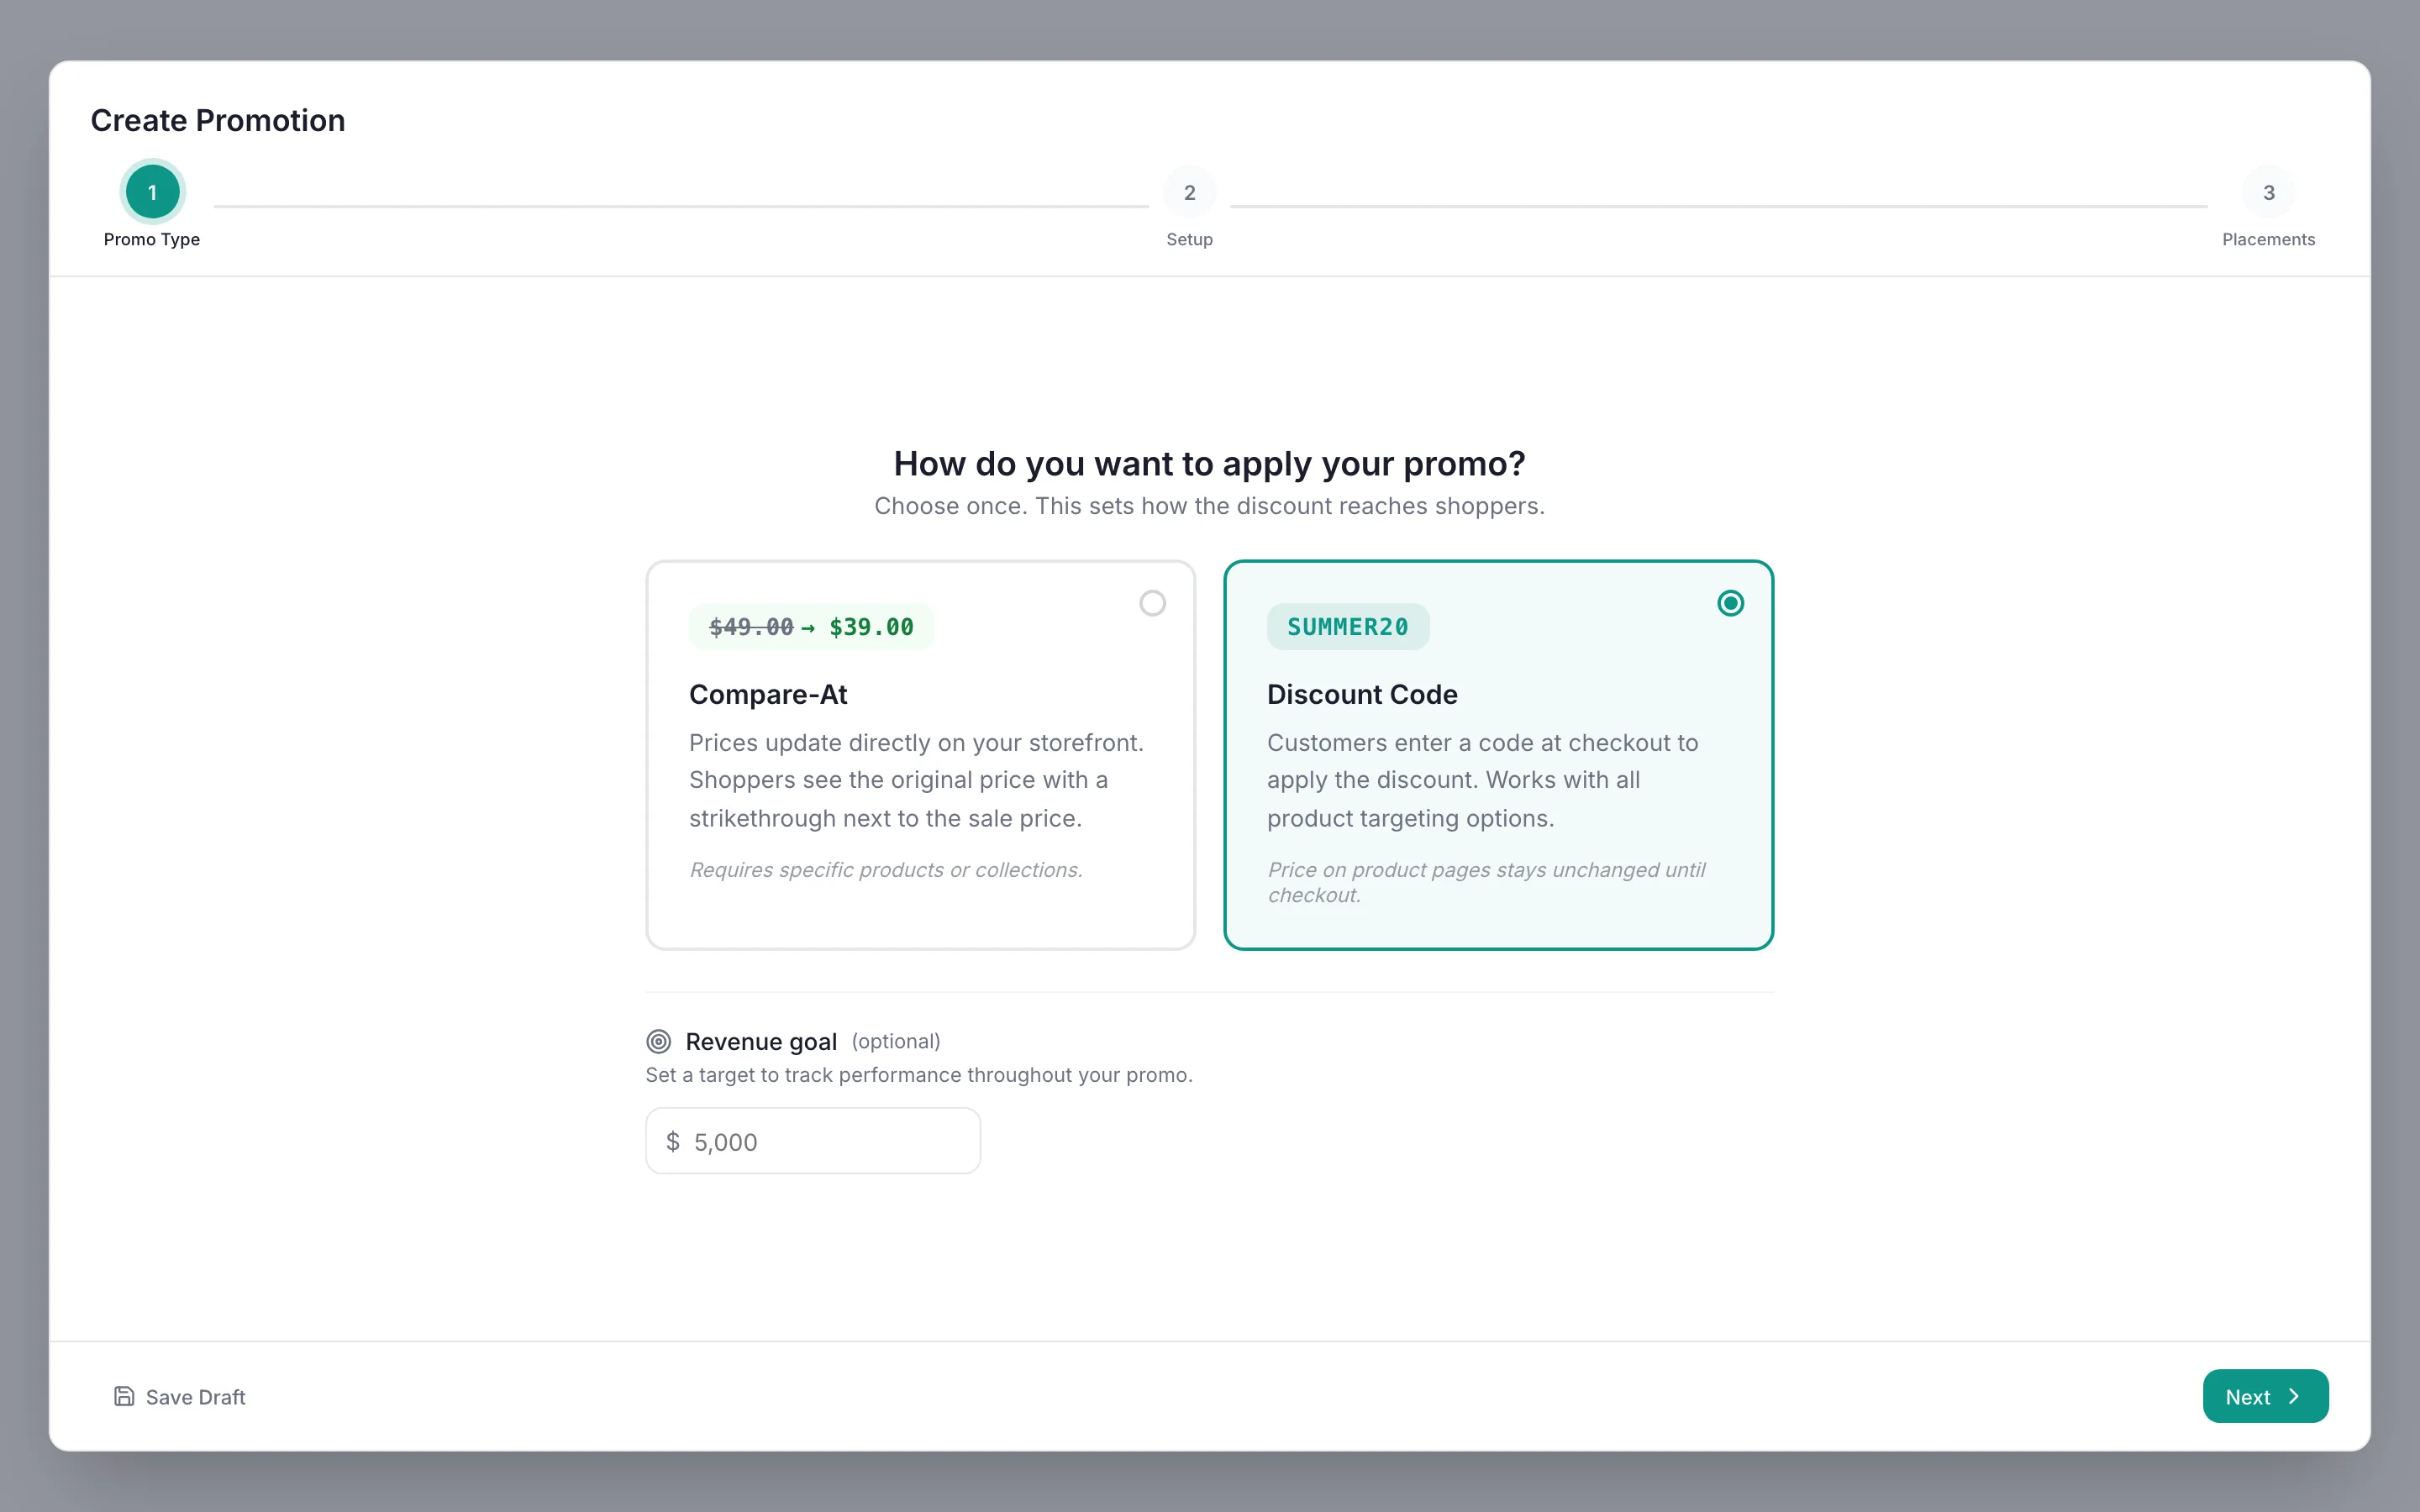
The first step asks how the promo should apply. Choose Discount Code: shoppers enter a code at checkout, and product-page prices stay unchanged until then. You can add an optional revenue goal here, then click Next.
Promo Type step with Discount Code selected Name it, pick BOGO and set the dates
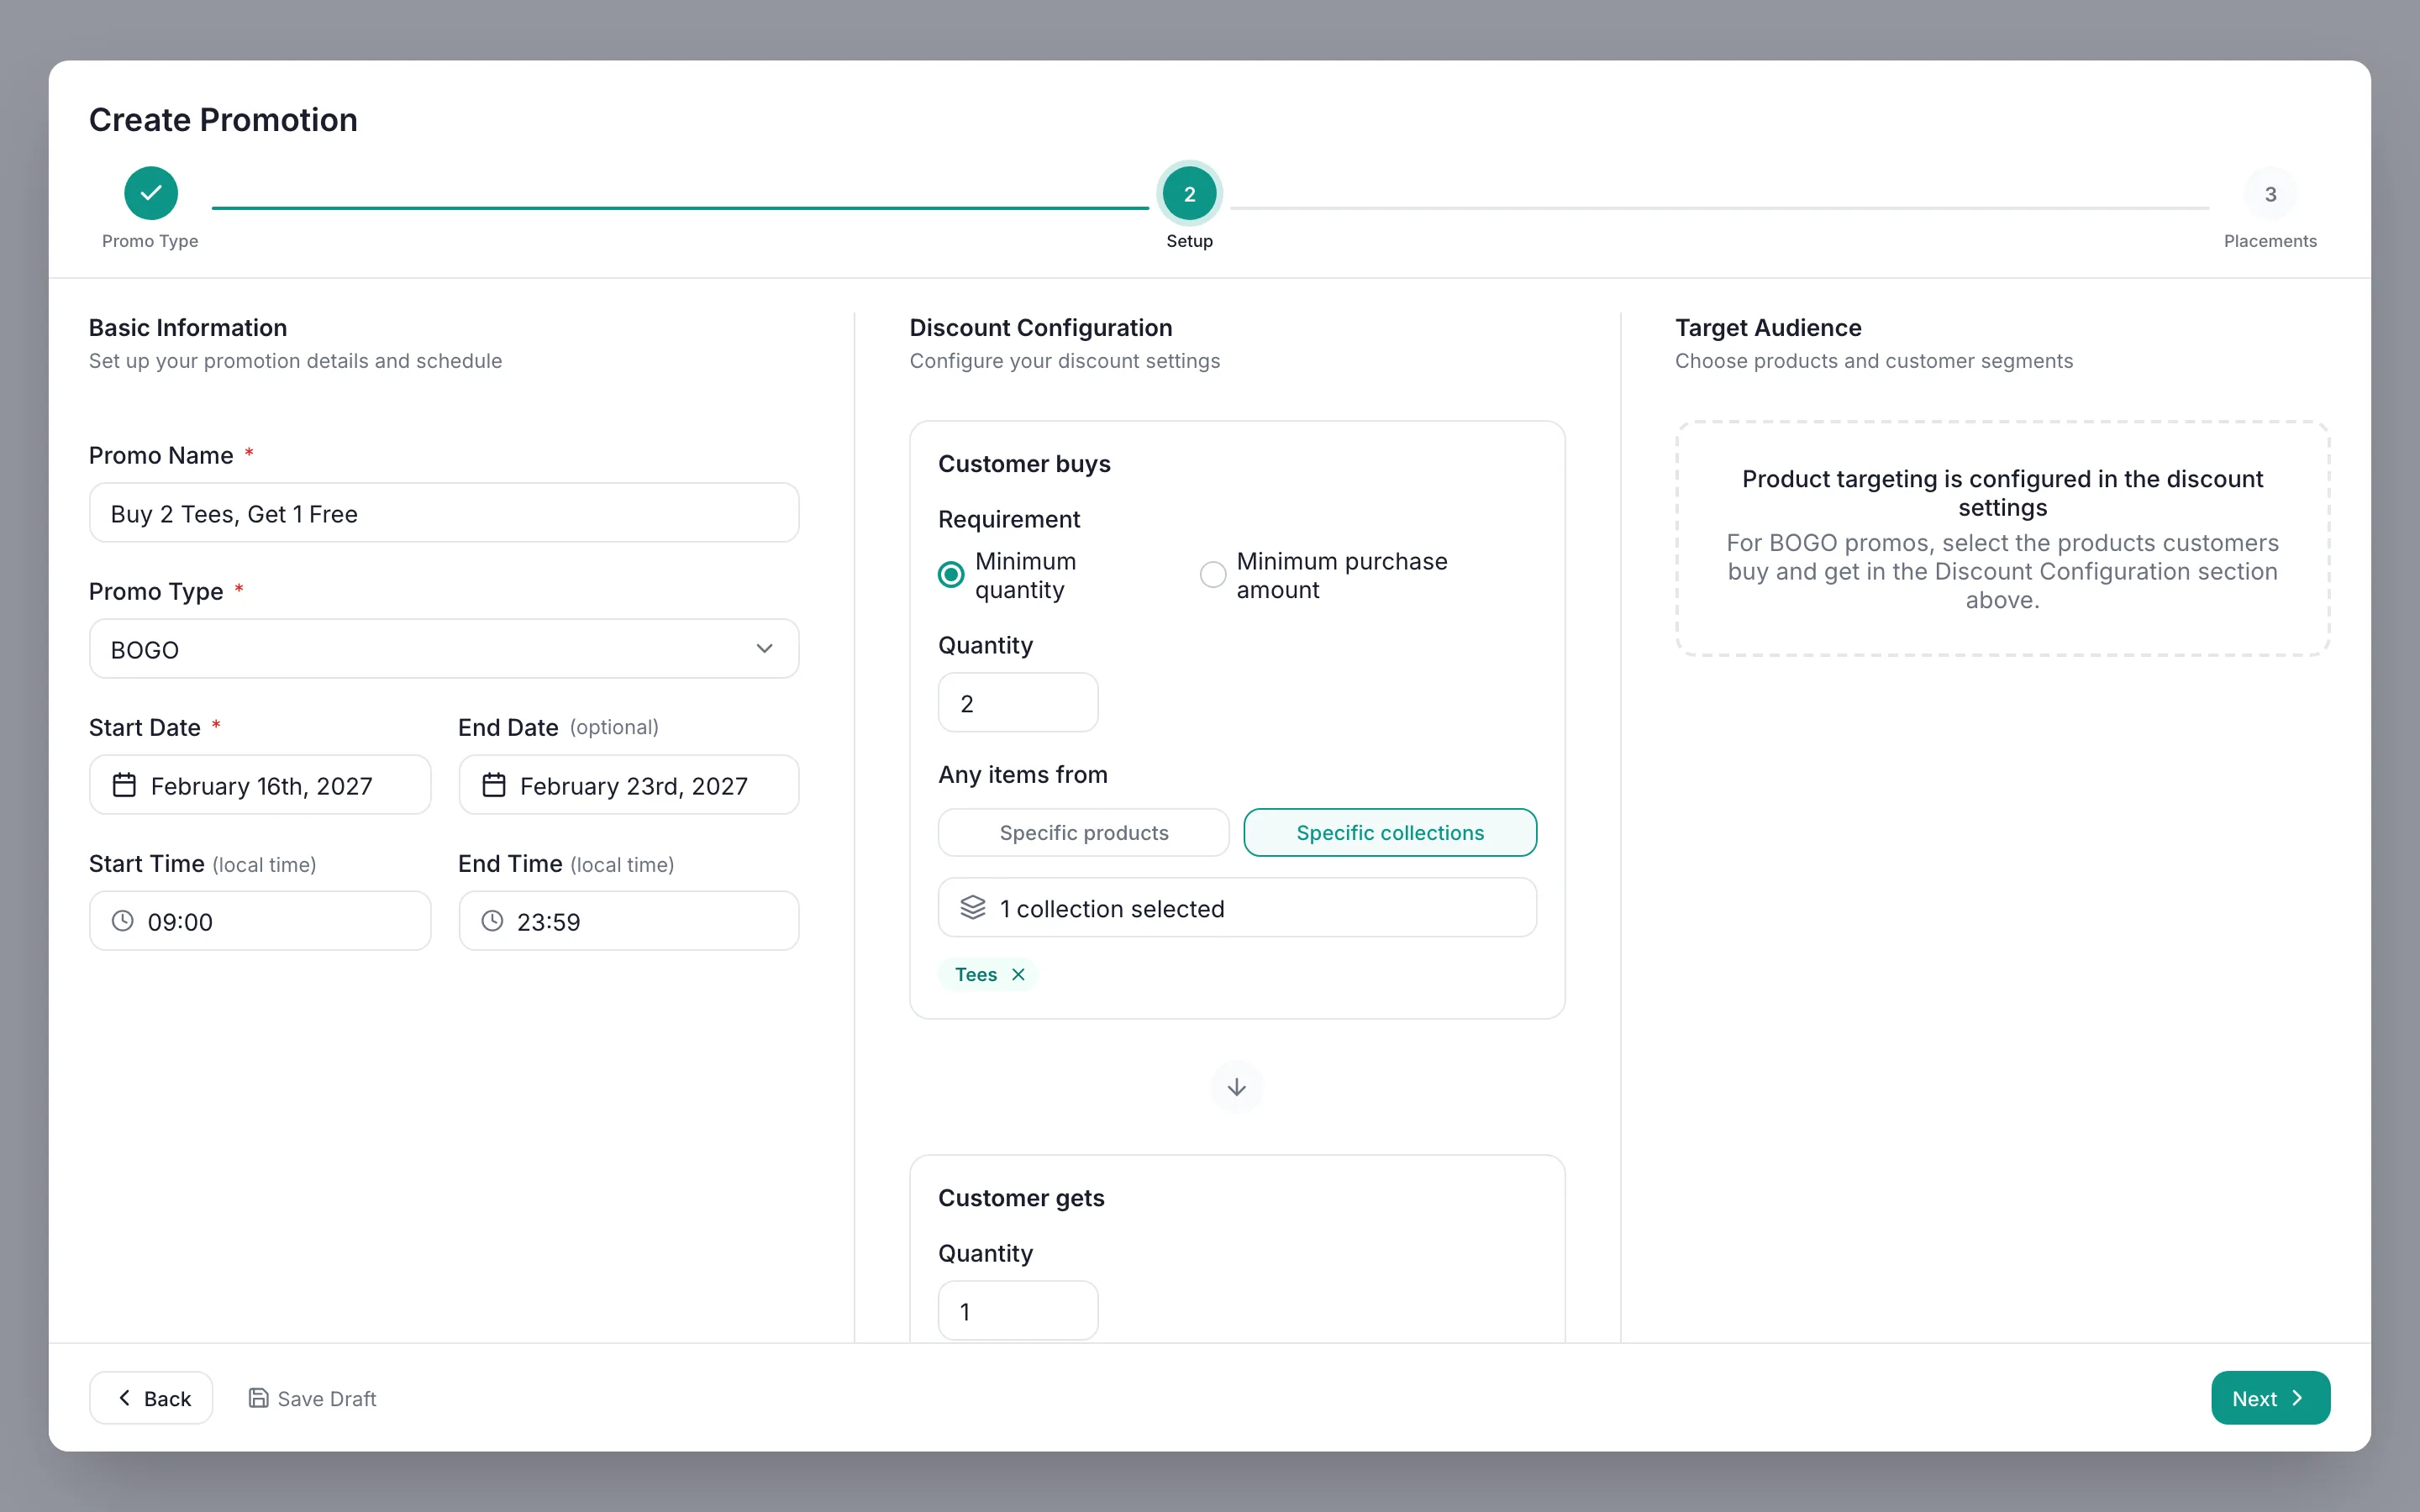
In Basic Information, enter the Promo Name and change Promo Type to BOGO. The Discount Configuration column switches to the Customer buys and Customer gets blocks. Set the Start Date, End Date and times.
Setup step with Promo Type set to BOGO Set what the customer buys
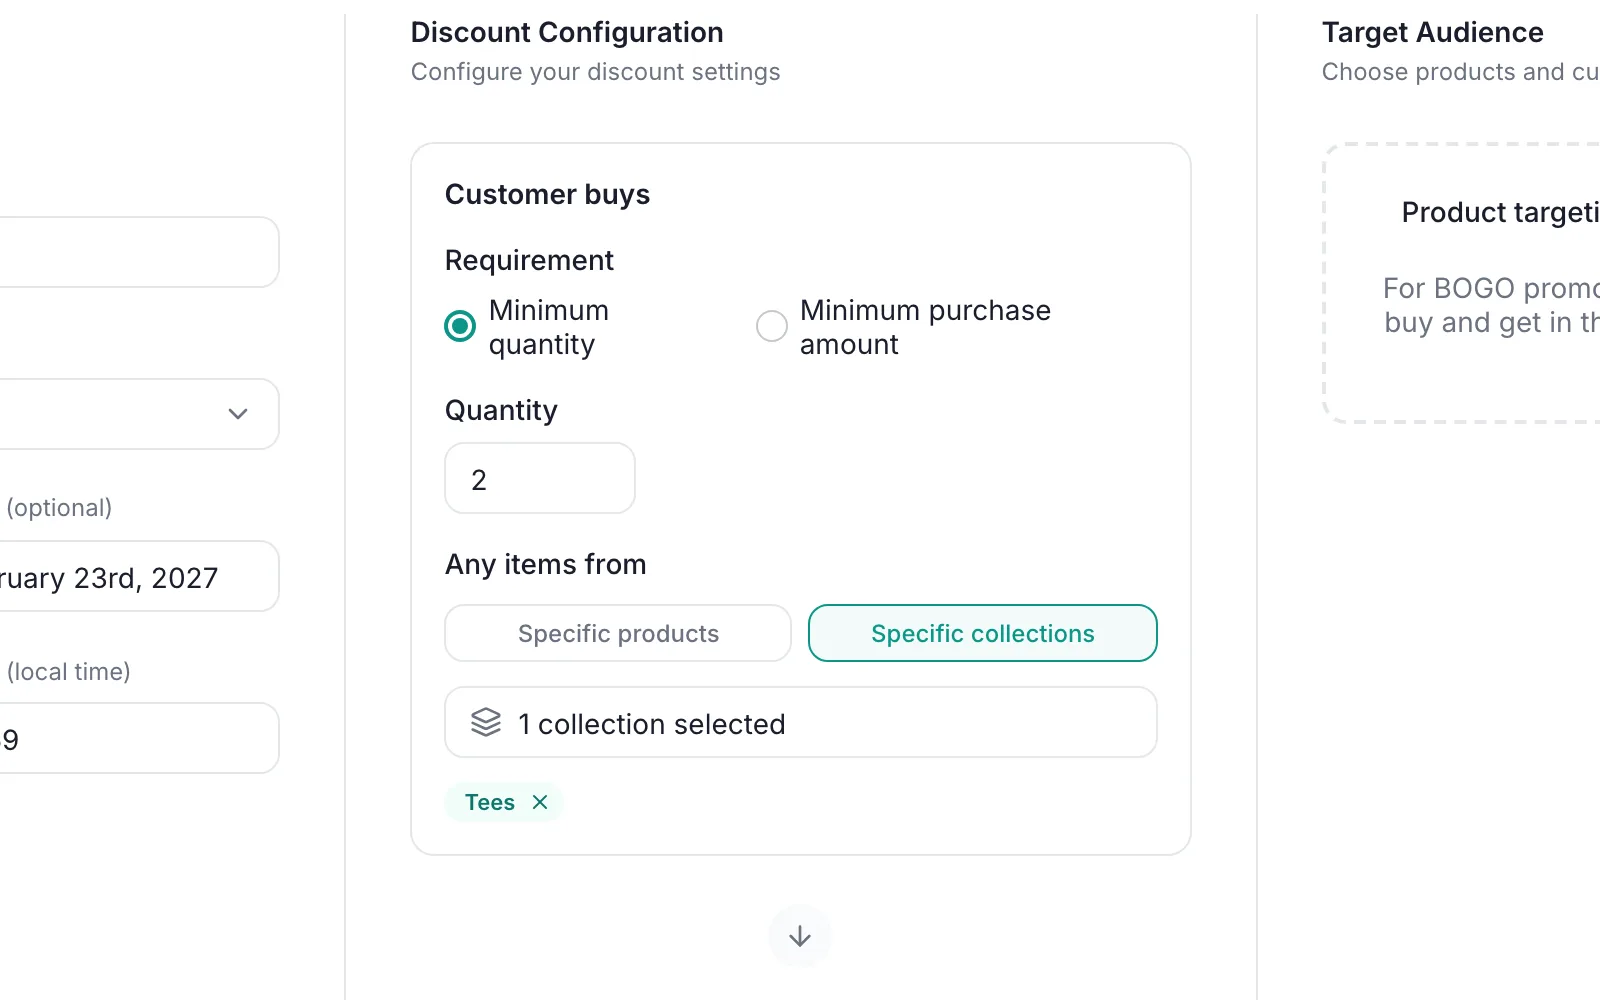
In Customer buys, keep Requirement on Minimum quantity and set Quantity to 2. Under Any items from, click Specific collections and pick Tees. The collection appears as a chip. Minimum purchase amount is the alternative if you prefer a spend threshold.
Customer buys set to 2 items from the Tees collection Set what the customer gets
In Customer gets, set Quantity to 1 and choose the same Tees collection under Any items from. Under At a discounted value, click Free. Percentage and Fixed amount ($) give a partial discount on the get item instead.
Tip
Below the blocks, Discount Method decides whether the deal applies automatically or needs a code. This guide uses Automatic, so shoppers get the free tee without typing anything.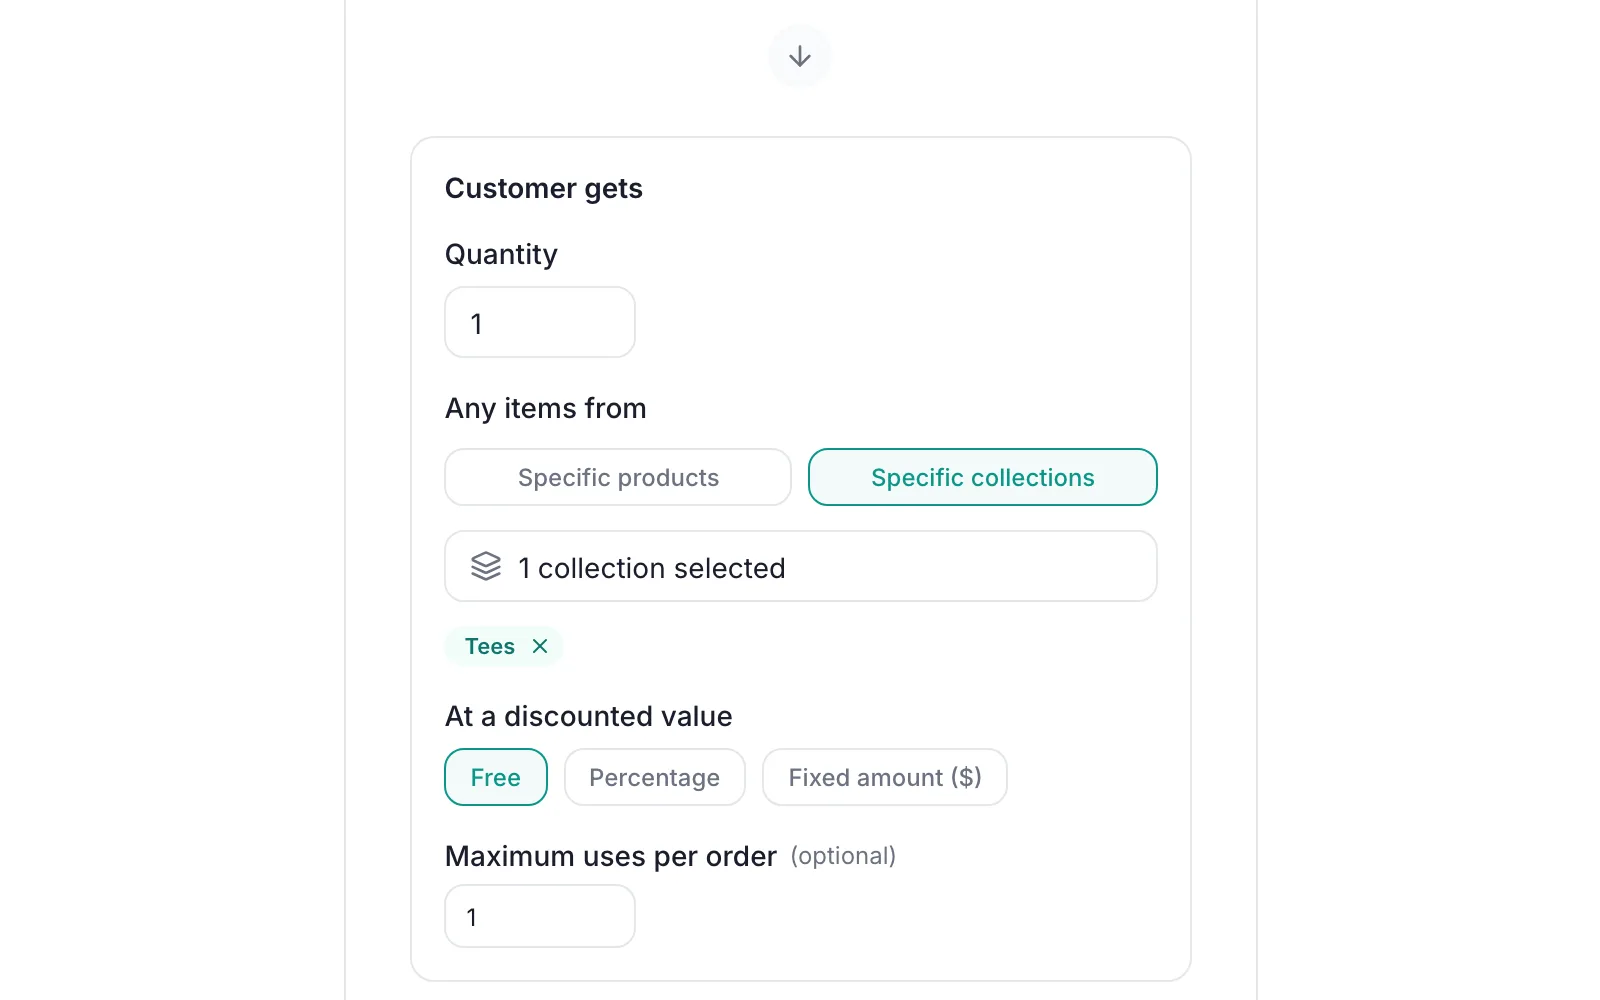
Customer gets set to 1 item from Tees, Free Add a banner, then click Create Promo
The Placements step is optional. Toggle an Announcement Bar or Hero Section on any store page to show Buy 2 Tees, Get 1 Free on your storefront, or leave every placement off. Click Create Promo. A future start date saves the promo as Scheduled and PromoOS activates it on time.
Note
Banners need the PromoOS theme block added to your theme once. The Placements step links to the instructions, and the Help Center walks through it.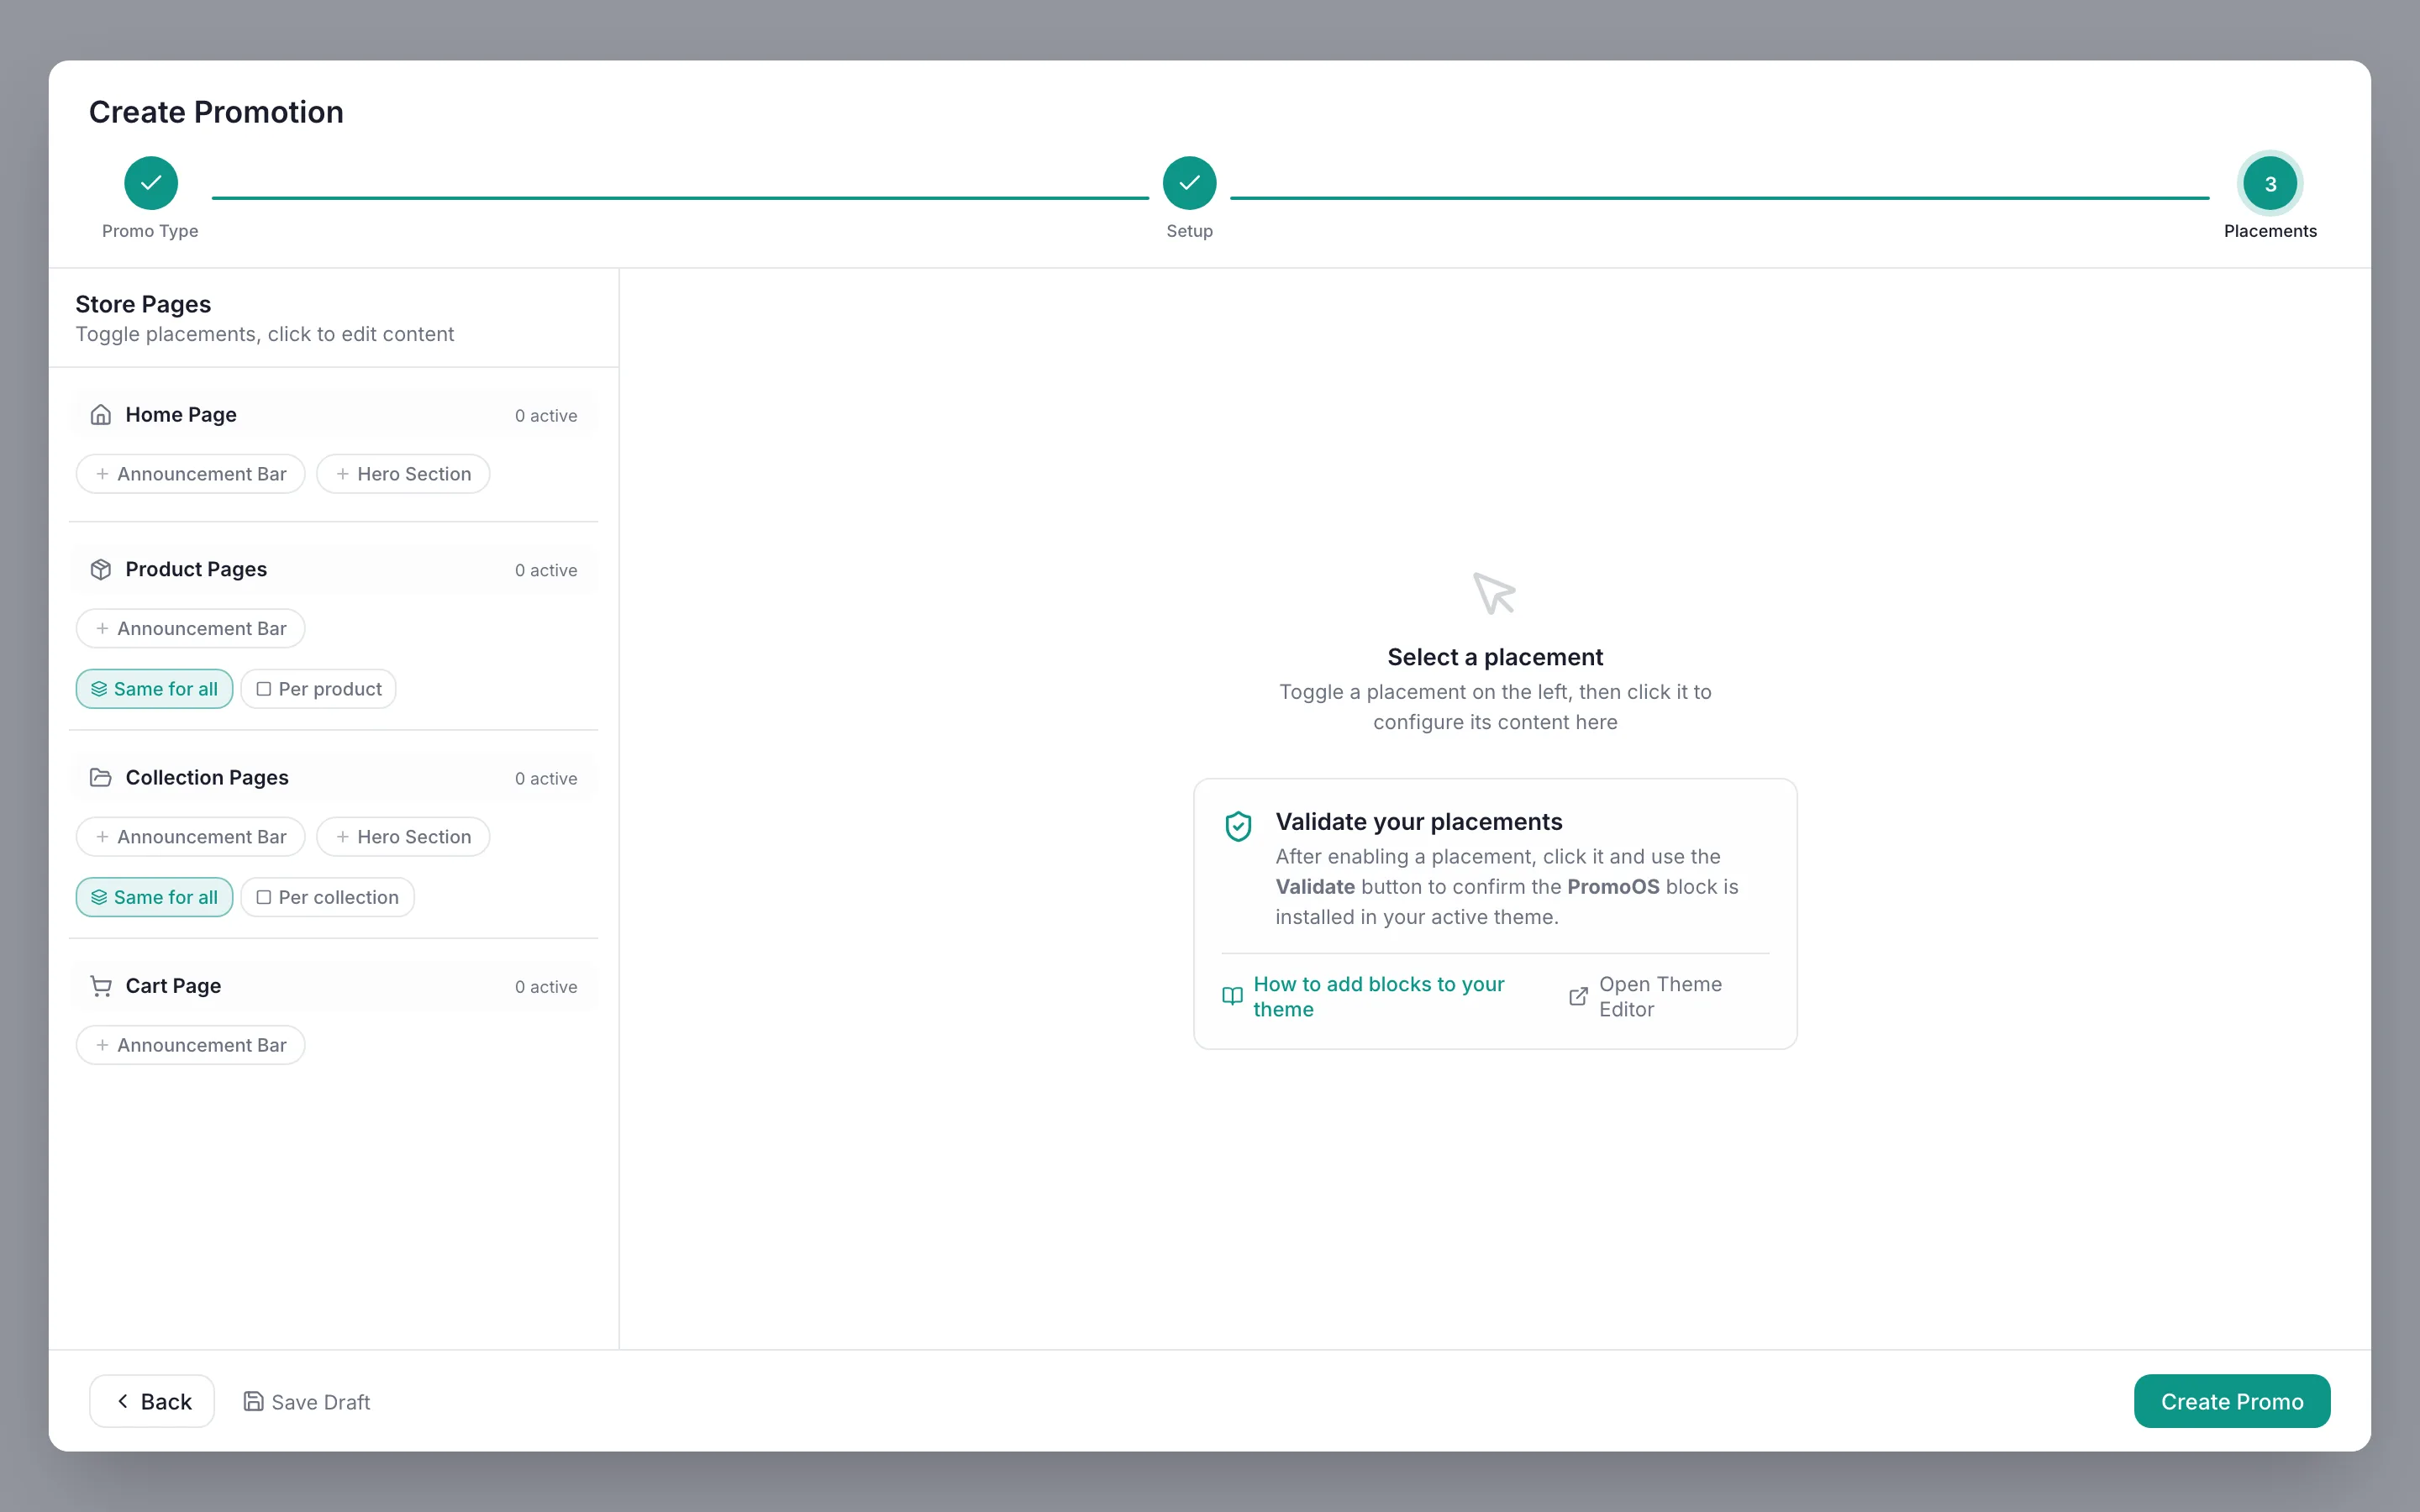
Placements step before any banner is added, with Create Promo ready
What Shoppers See
- Tee prices stay unchanged on product pages
- With two tees in the cart, a third tee is discounted to free at checkout, once per order
- No code is needed because the Discount Method is Automatic
Questions
Related Guides
Set up a percentage discount
A percent-off code with a start and end date, targeting all products or a subset.
Schedule a sale in advance
Set the dates once. PromoOS activates the sale, flags product overlaps, and ends it on time.
Also useful: All promo types in the Help CenterPromo cost calculator
Free plan · No credit card
Set up your next promo in PromoOS.
Free plan: up to 3 promos, 1 active at a time, no credit card. Upgrade only if you outgrow it.
Install PromoOS free