How-to guide
How to Set Up Compare-At (Crossed-Out Price) Sale Pricing on Shopify
A Compare-At promo changes the real price of the products you pick, shows the original with a strikethrough on the storefront, and restores it when the promo ends. This guide creates Accessories Clearance, 25% off two products, running February 9 to 28.
6 steps About 3 min
When to Use It
Use Compare-At when the sale needs to be visible while people browse. The strikethrough does the selling on the product and collection pages, so nobody has to remember a code.
- Clearance on a specific set of products
- Sales you want visible in collection grids, not only at checkout
- Stores that avoid discount codes on principle
Heads up
Set It Up in 6 Steps
Open Create Promo from the Dashboard
Sign in to PromoOS and click Create Promo in the header. The Create Promotion dialog opens on the Promo Type step.
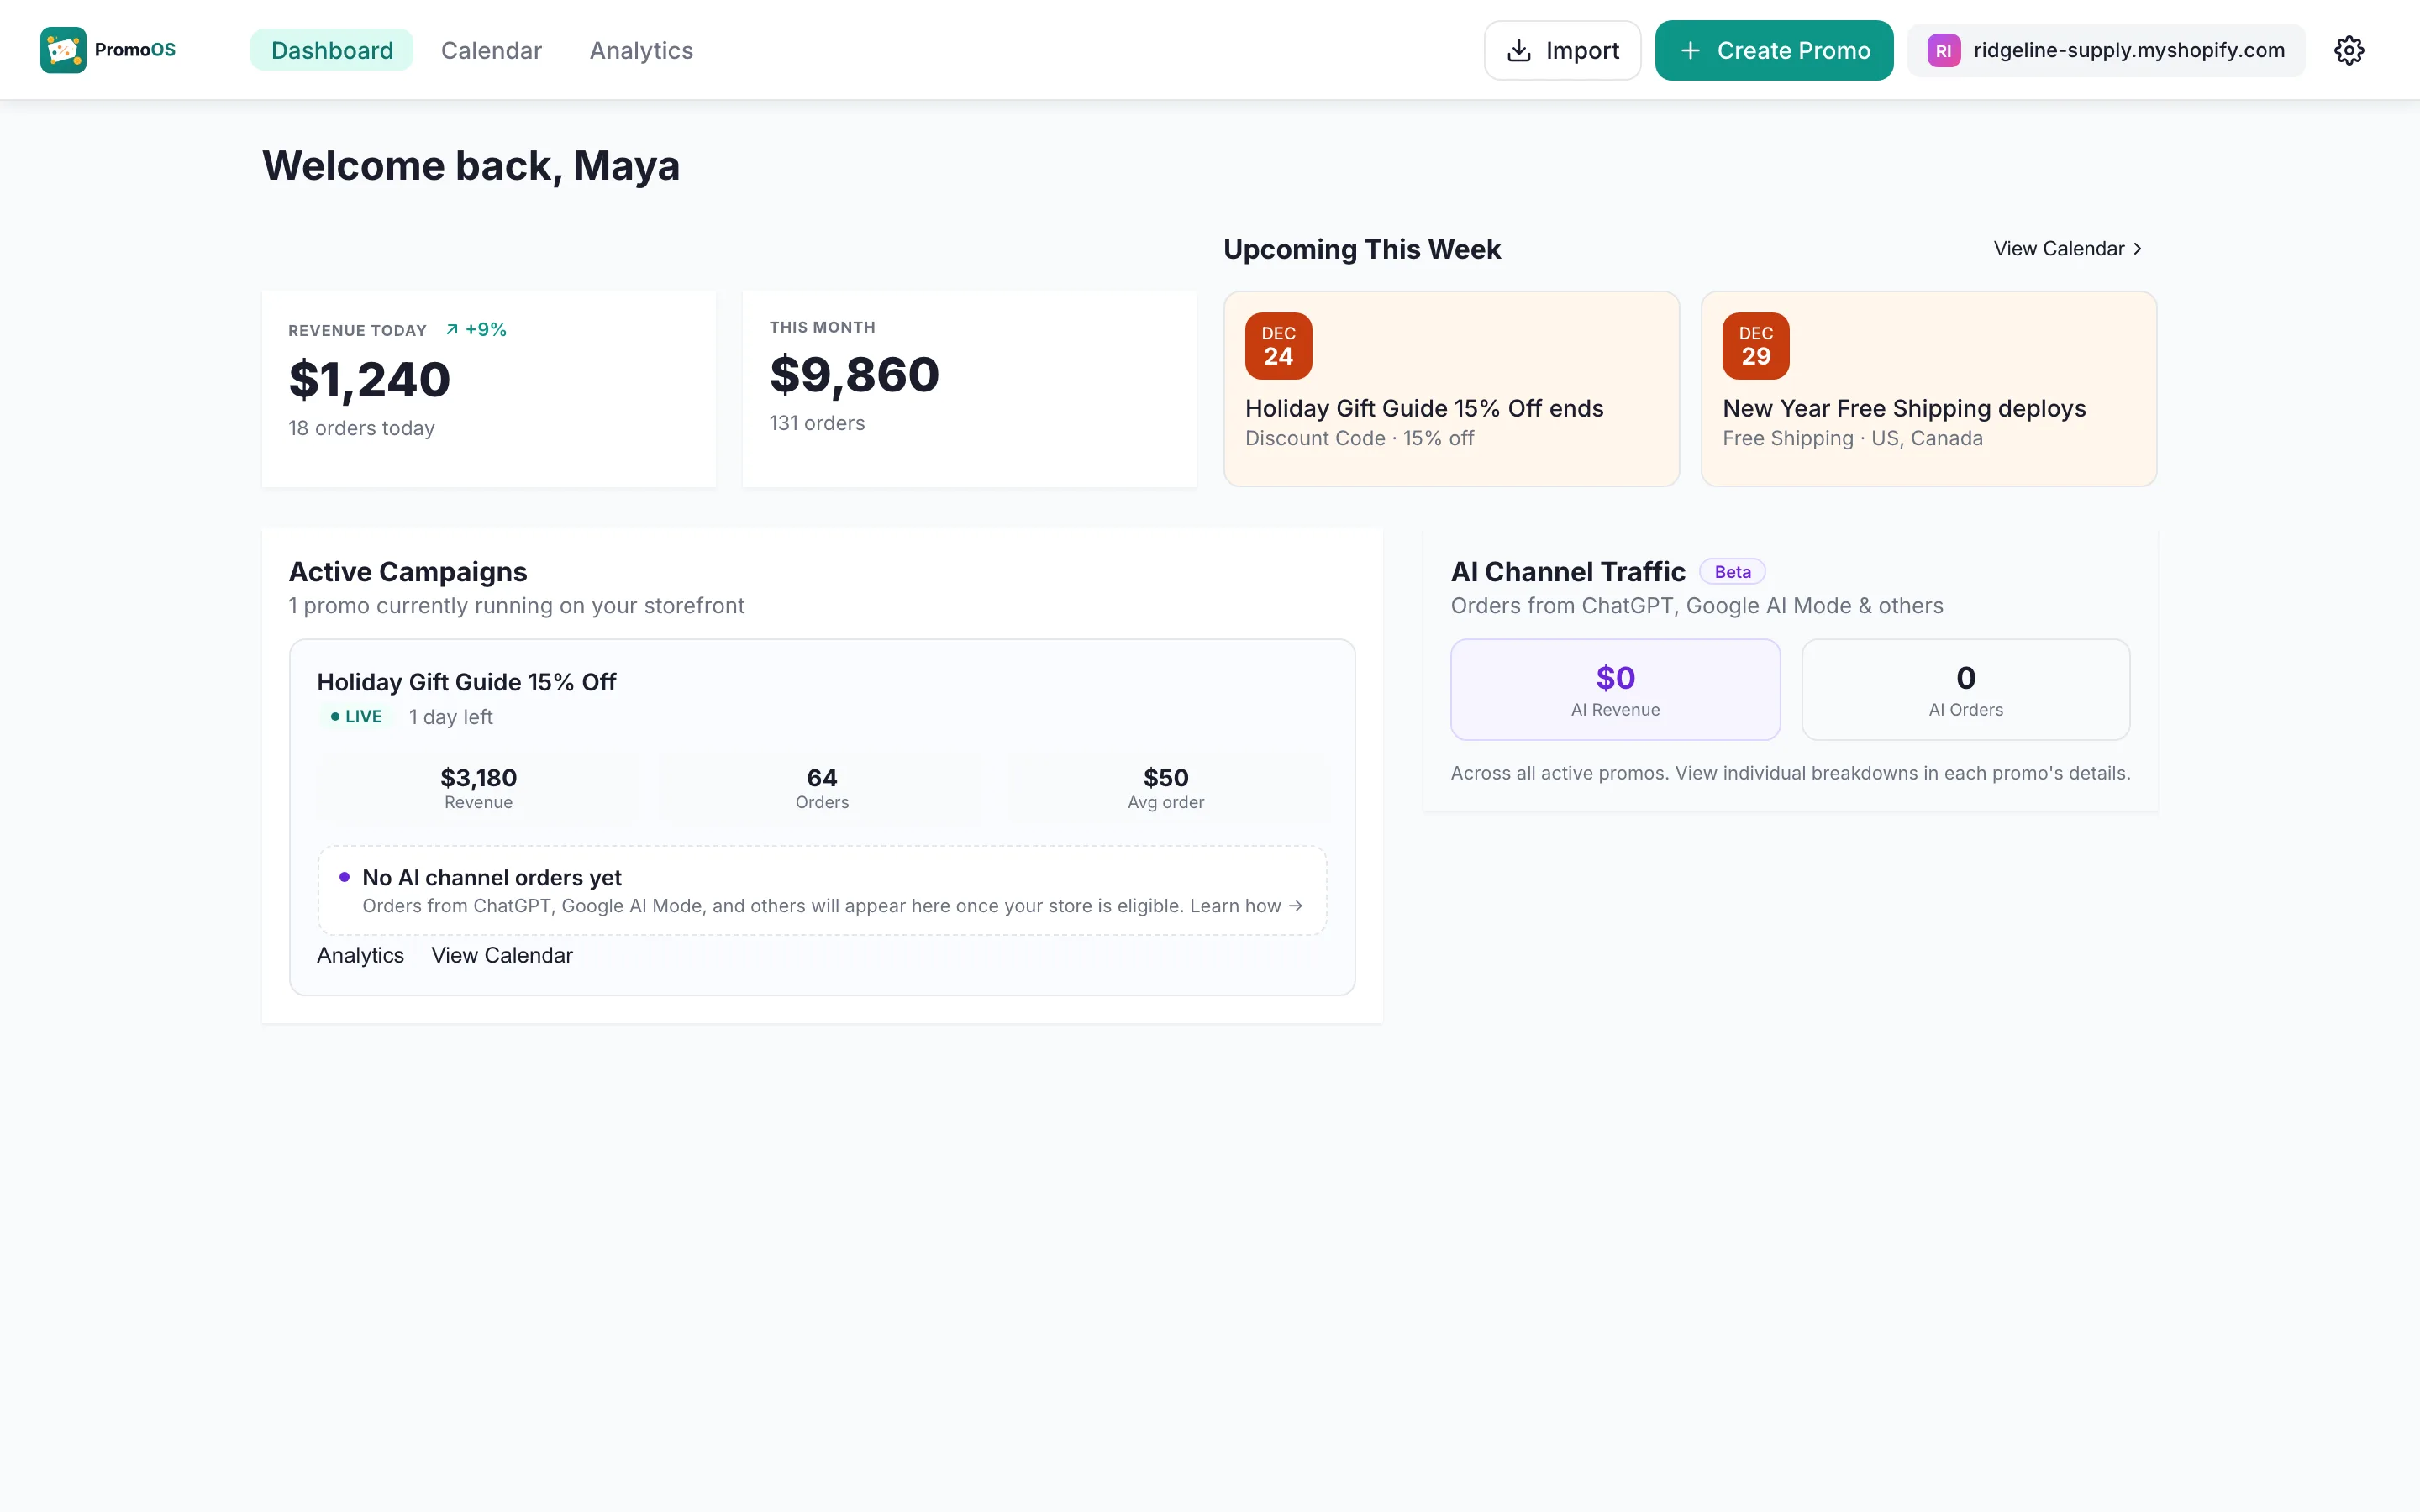
The Dashboard with Create Promo in the top right Choose Compare-At as the mechanism
On the Promo Type step, choose Compare-At. Prices update directly on your storefront and shoppers see the original price with a strikethrough next to the sale price. Click Next.
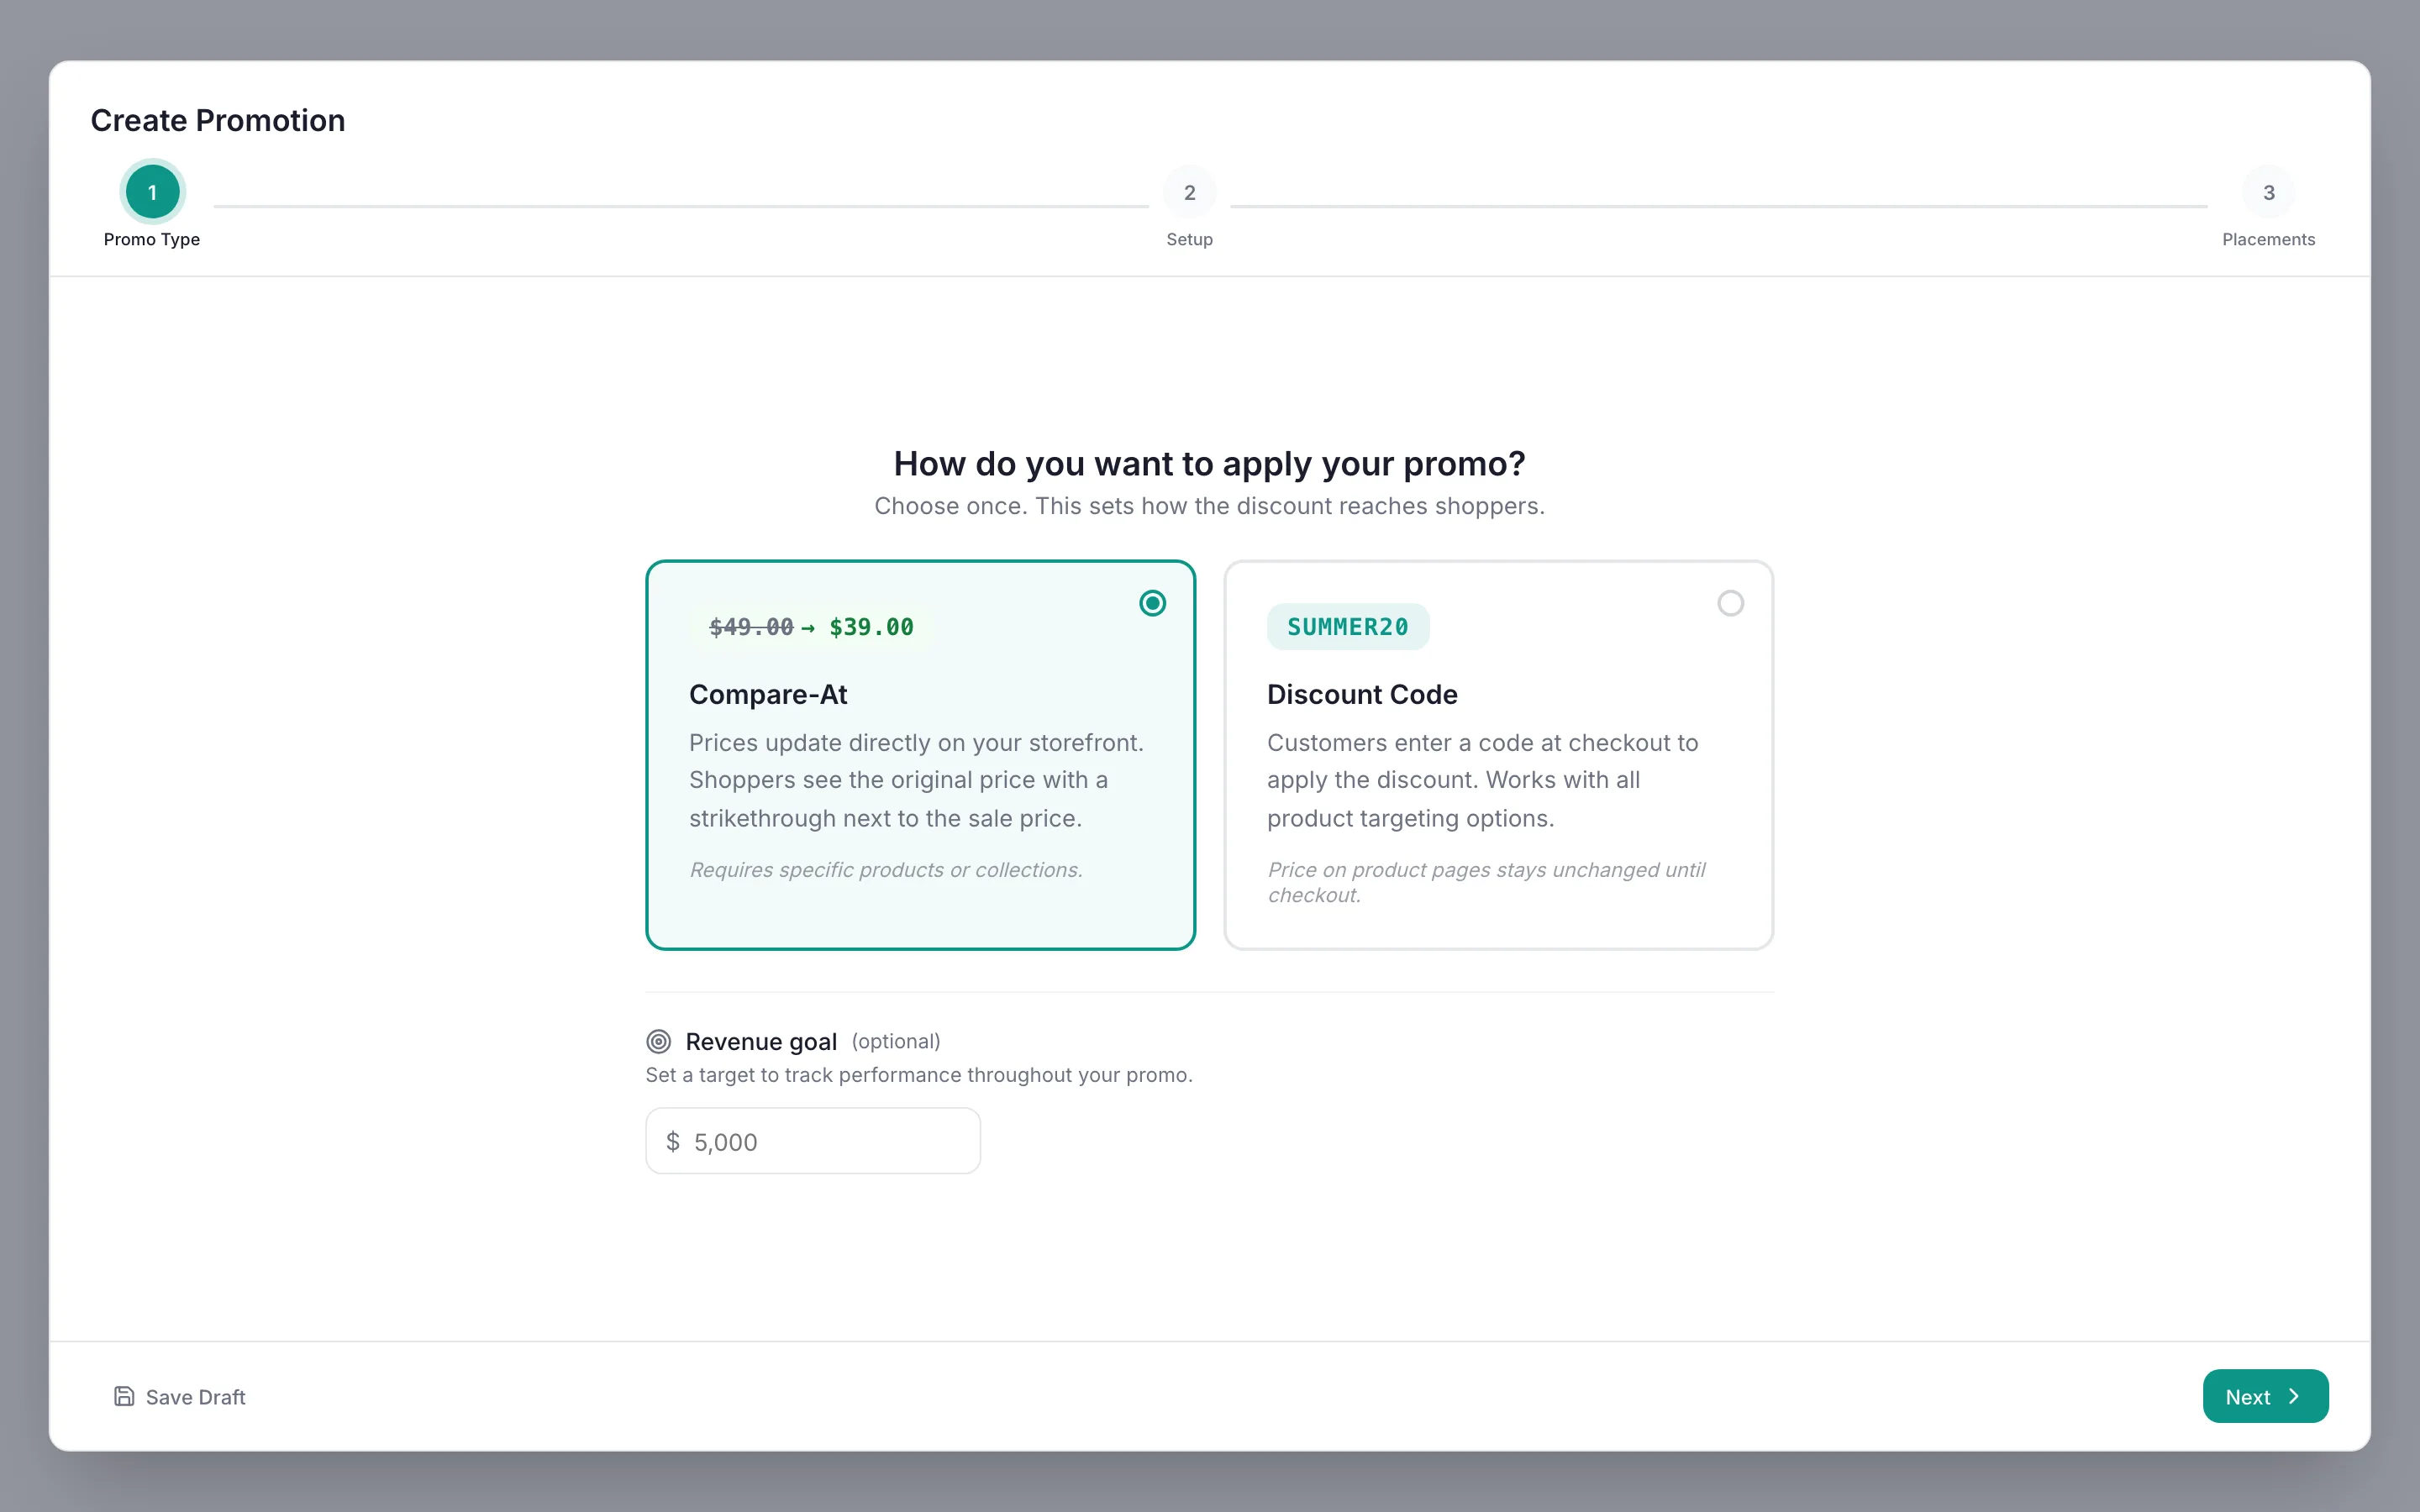
Promo Type step with Compare-At selected Set the dates and pick Specific Products
In Basic Information, enter the Promo Name and set the dates and times. In Compare-At Setup, under Apply To, choose Specific Products. Specific Collections works the same way for a whole collection.
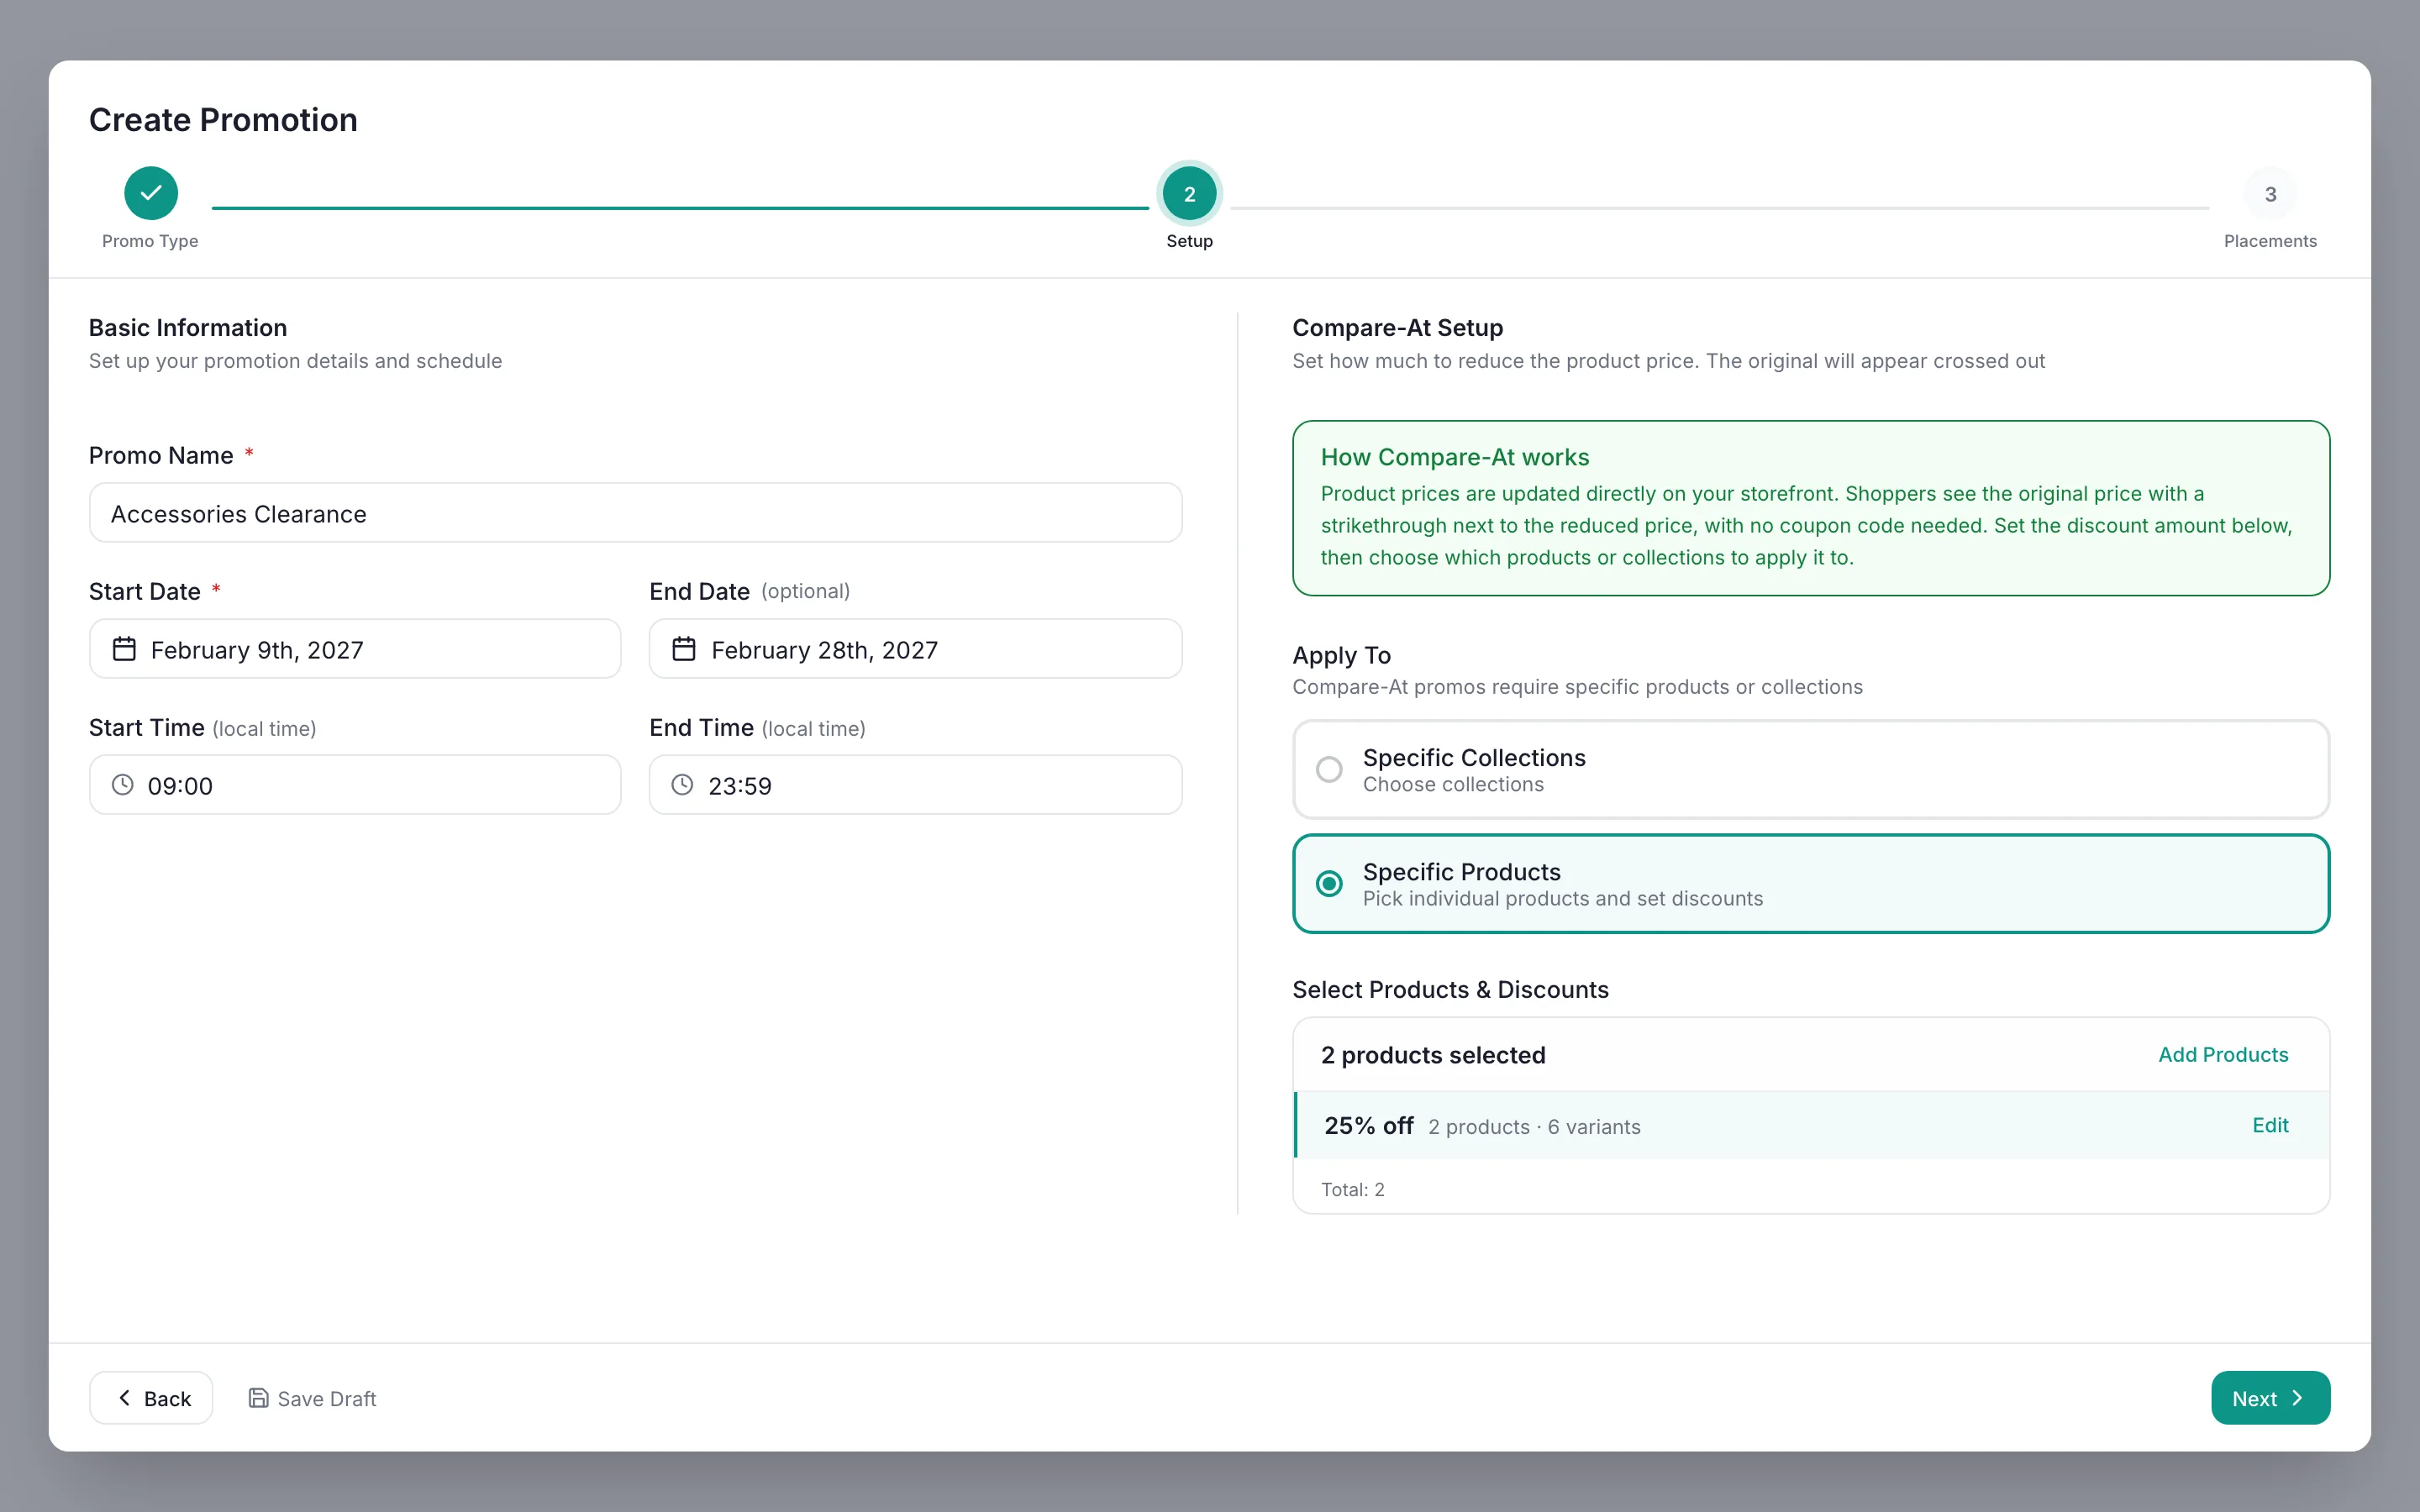
Setup step for a Compare-At promo with Specific Products selected Pick the products and set the rate
Click Select products & set discounts to open the picker. Tick the products, enter 25 with % selected, and click Apply. Each assigned row shows the original price, the new sale price and the rate. Click Done.
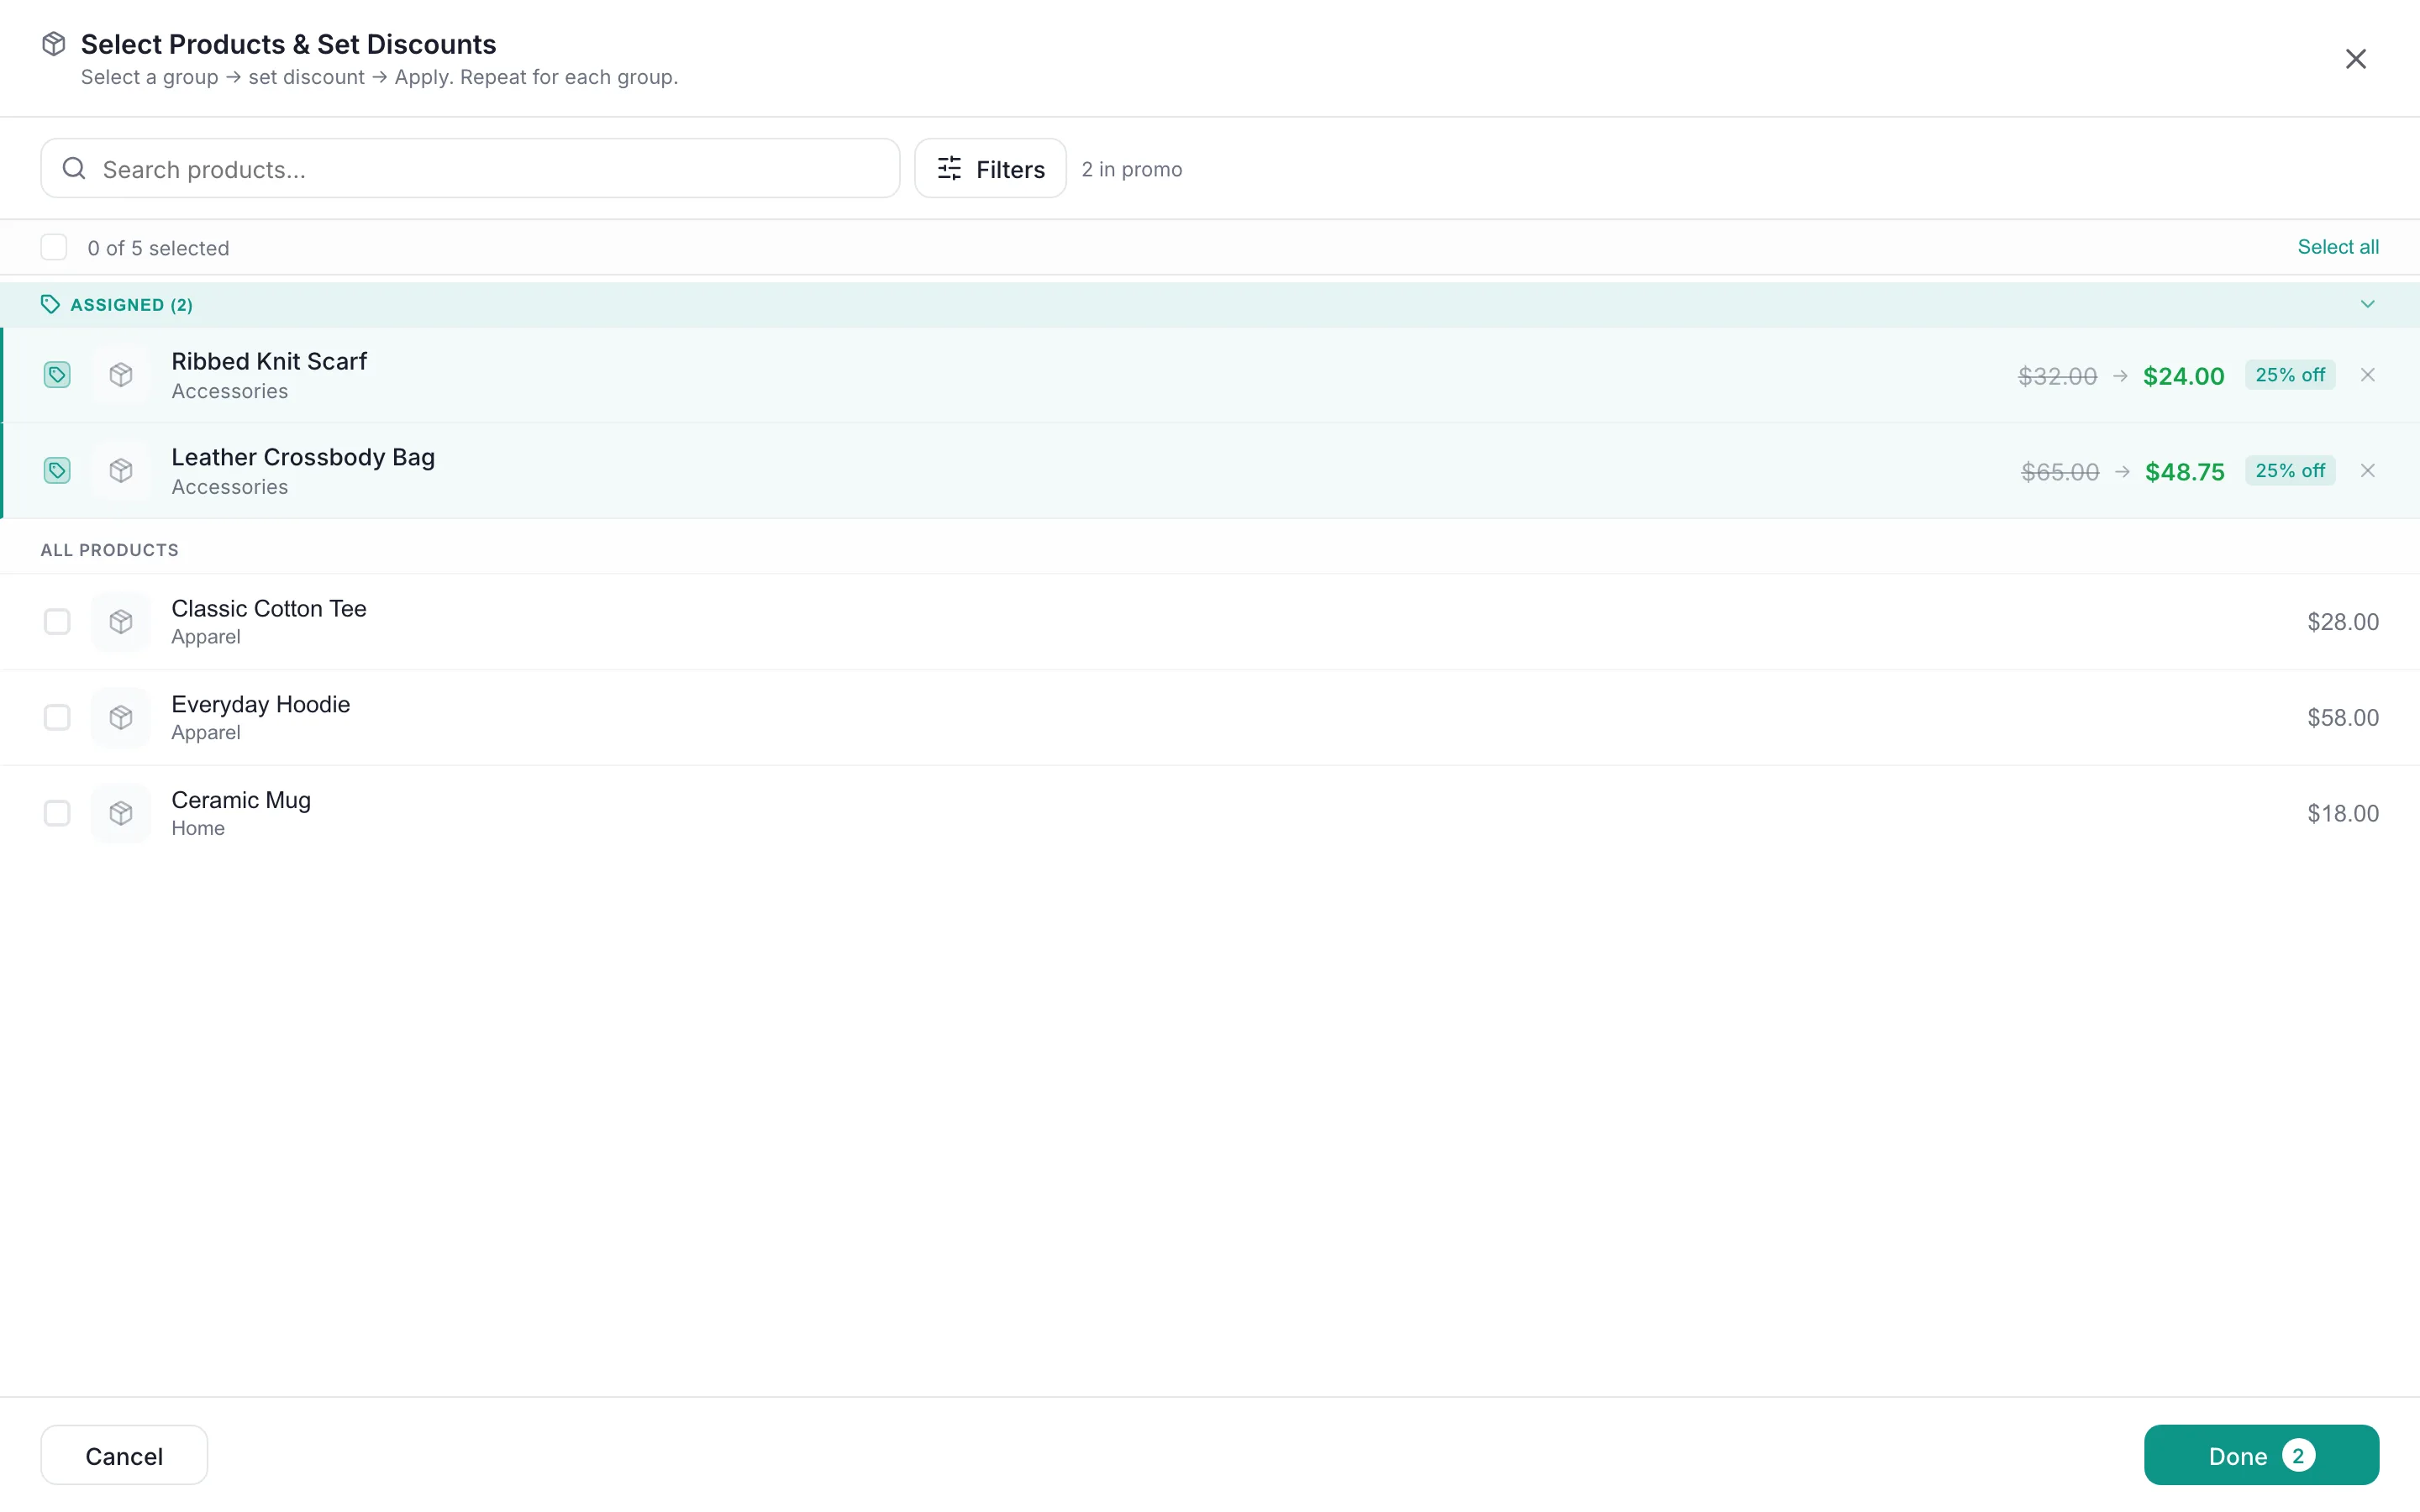
The product picker with two products assigned at 25% off Check the Discount Plan
Back on the Setup step, the Discount Plan card lists one row per rate with the product count. Use Edit to change a rate or Add Products to extend the sale. Every selected product must have a rate before Next is available.
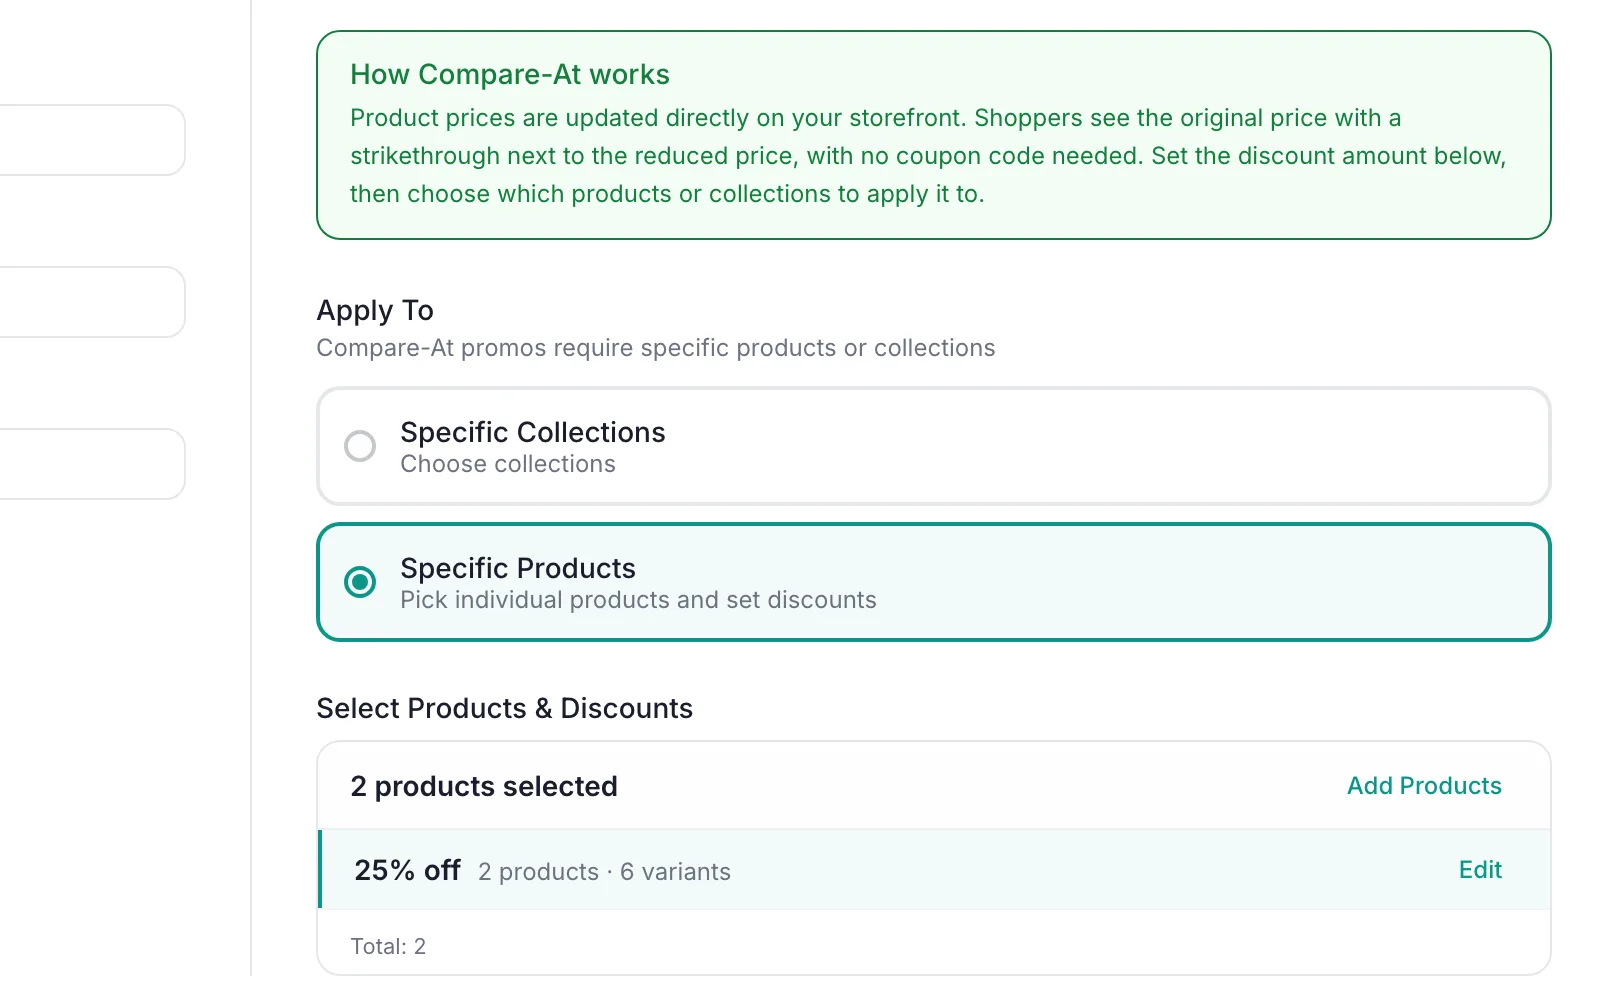
The Discount Plan card summarising 25% off on 2 products Add a banner, then click Create Promo
The Placements step is optional. Toggle an Announcement Bar or Hero Section on any store page to show Accessories Clearance on your storefront, or leave every placement off. Click Create Promo. A future start date saves the promo as Scheduled and PromoOS activates it on time.
Note
Banners need the PromoOS theme block added to your theme once. The Placements step links to the instructions, and the Help Center walks through it.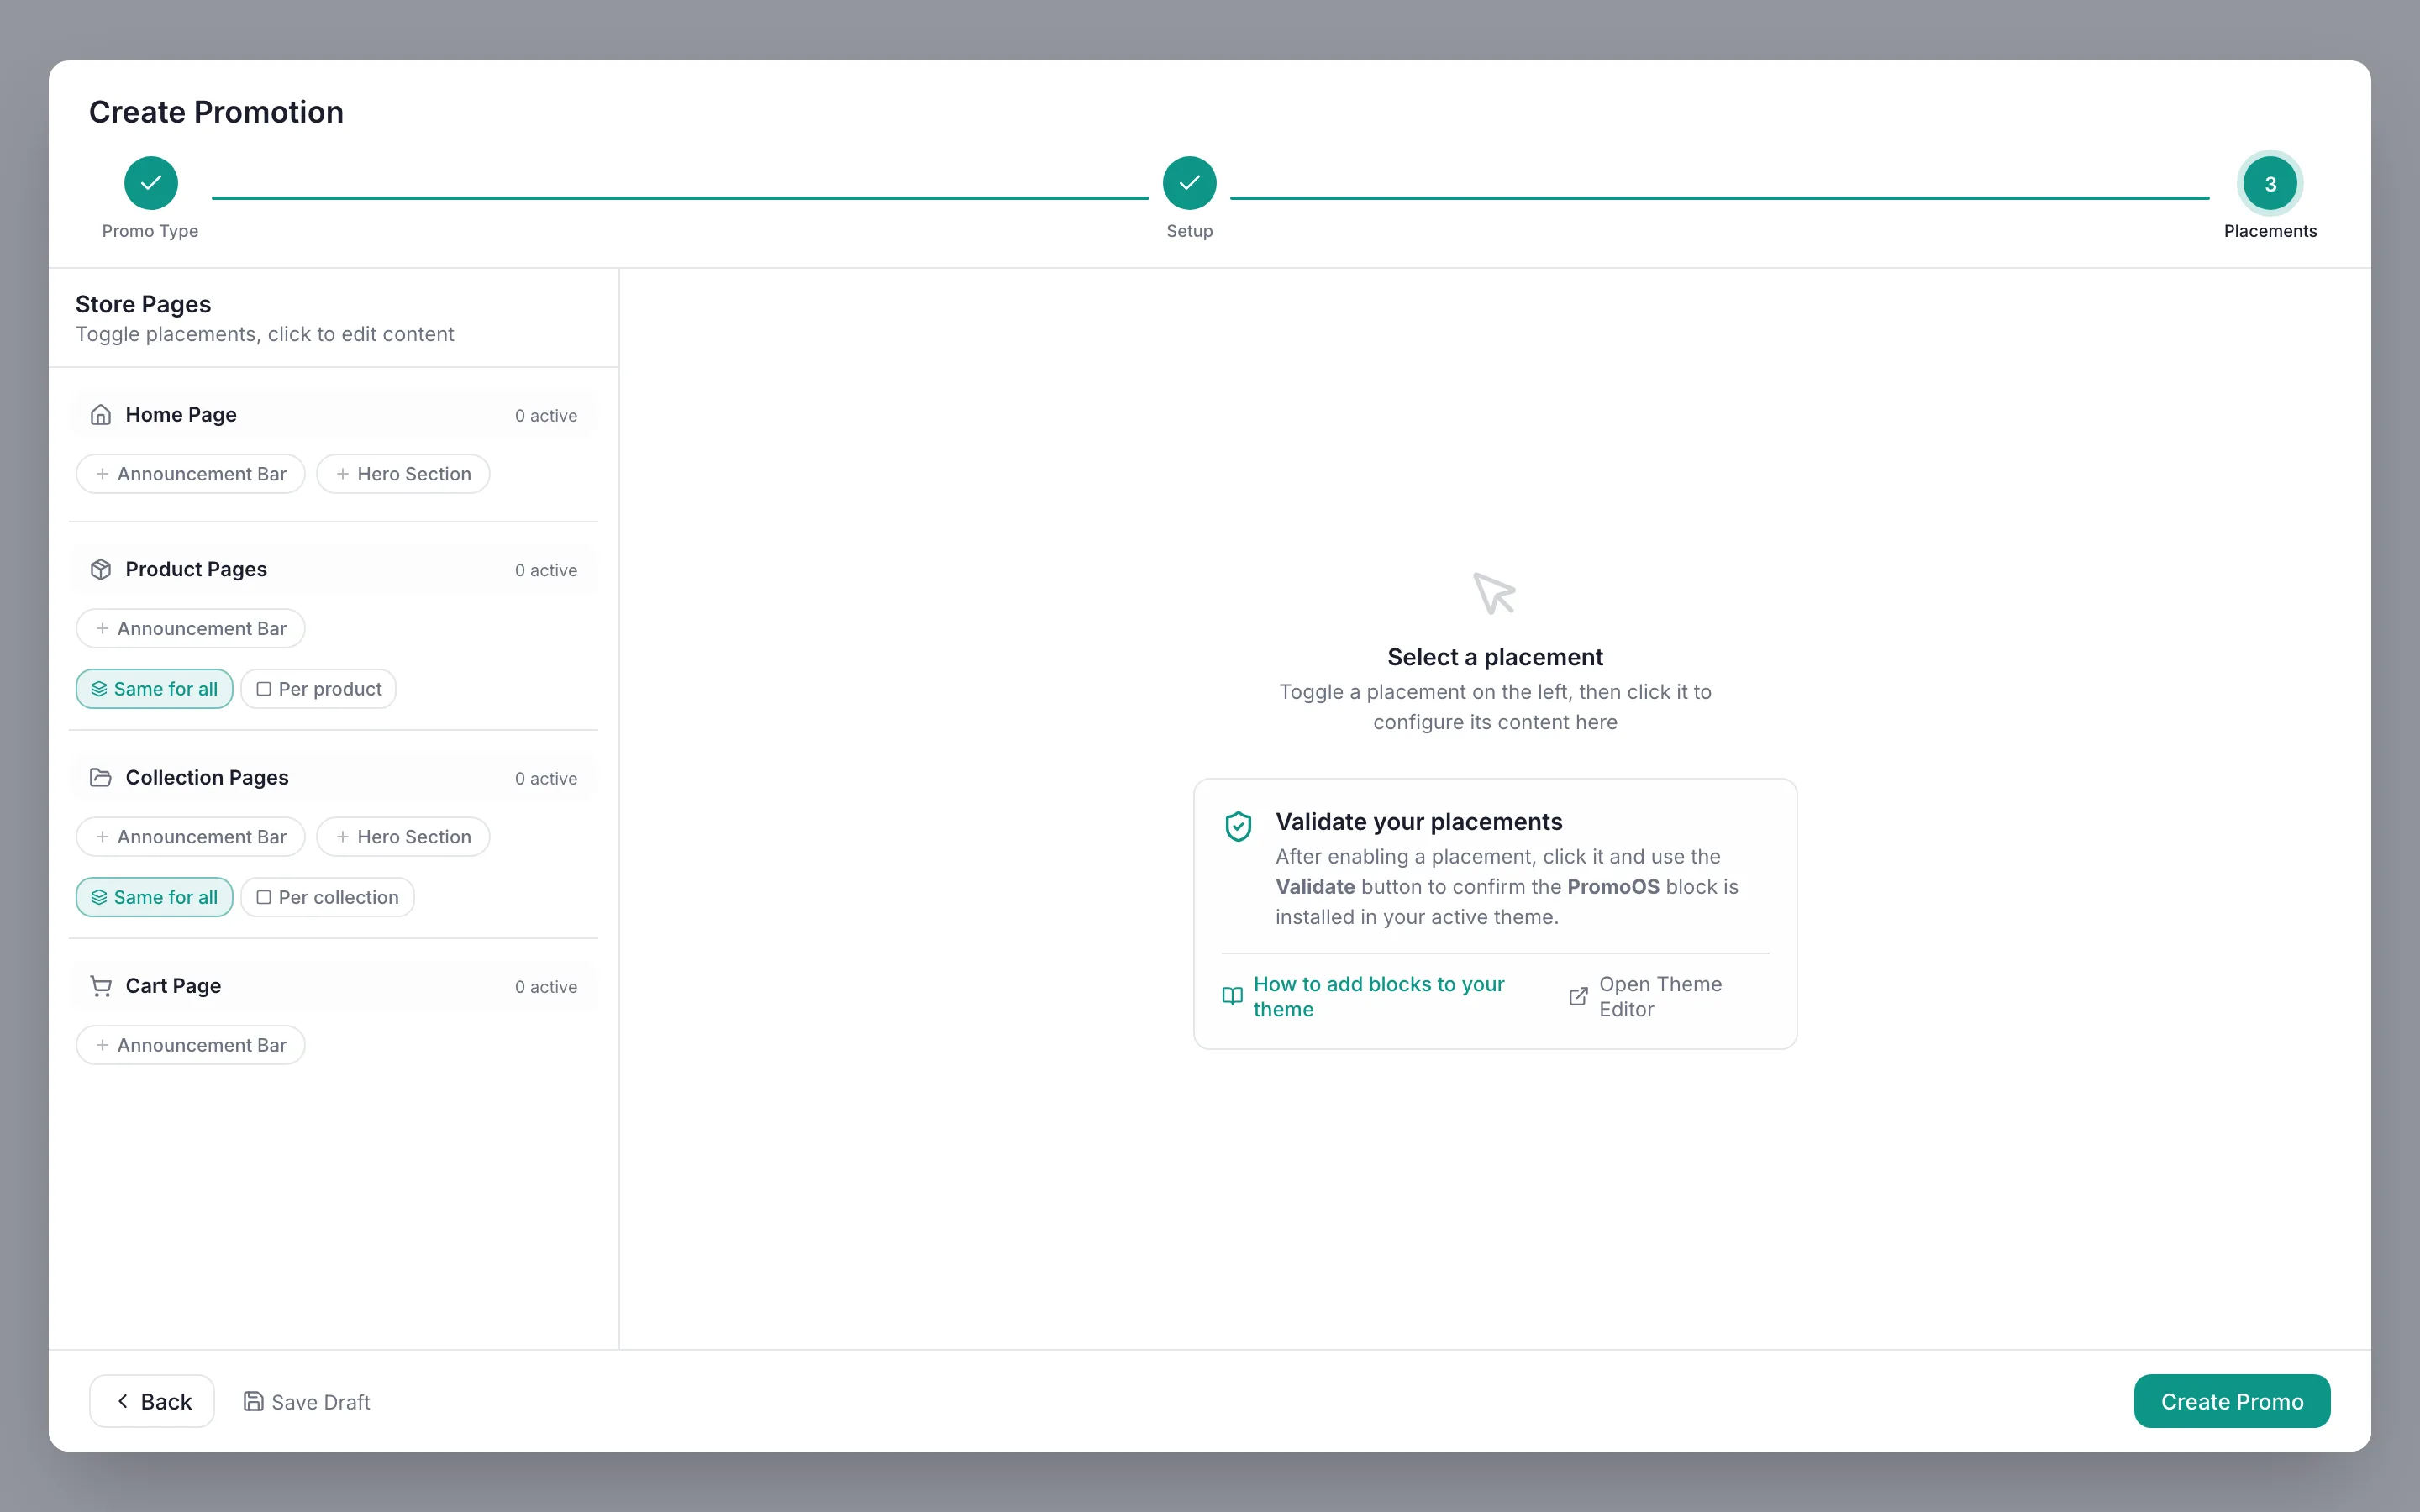
Placements step before any banner is added, with Create Promo ready
What Shoppers See
- Product and collection pages show the original price crossed out next to the sale price
- No code is needed; the sale price is the price
- When the promo ends, PromoOS restores the prices it captured at deploy time
Questions
Related Guides
Schedule a sale in advance
Set the dates once. PromoOS activates the sale, flags product overlaps, and ends it on time.
Set up a percentage discount
A percent-off code with a start and end date, targeting all products or a subset.
Also useful: Theme block setupCompare-at pricing on the blog
Free plan · No credit card
Set up your next promo in PromoOS.
Free plan: up to 3 promos, 1 active at a time, no credit card. Upgrade only if you outgrow it.
Install PromoOS free